What is x402?
x402 is the HTTP 402 “Payment Required” status code reborn as a minimal protocol for internet‑native micropayments. Instead of subscriptions or paywalls that require accounts, x402 lets any HTTP endpoint become instantly payable:- Client requests a resource
- Server responds 402 with a small JSON payment requirement
- Client pays with a signed transaction
- Server verifies and serves the content
Beyond legacy limitations
x402 is designed for a modern internet economy, solving key limitations of legacy systems:- Reduce fees and friction: Direct onchain payments without intermediaries, high fees, or manual setup.
- Micropayments & usage-based billing: Charge per call or feature with simple, programmable pay-as-you-go flows.
- Machine-to-machine transactions: Let AI agents pay and access services autonomously with no keys or human input needed.
Why x402 on Monad?
Monad is a fully EVM‑compatible Layer 1 with:- 10,000 TPS
- ~0.4s block times
- Single‑slot finality
- Parallel execution
- Extremely low fees
Core Flow (Direct Payment)
Facilitator Flow (Recommended for Production)
A facilitator service is optional but recommended in production. Facilitators can batch transactions, cover gas, handle refunds, and simplify client logic.Building an x402-based app using Monad x402 facilitator
Prerequisites
- Node.js 18+
- An EVM wallet
- Access to Monad testnet funds (USDC test tokens below)
Monad Facilitator only supports x402 version 2 and above.Migration guide that explains the differences: https://docs.x402.org/guides/migration-v1-to-v2
How to get USDC tokens on Monad testnet
How to get USDC tokens on Monad testnet
You can get USDC tokens for Monad testnet using Circle’s faucet: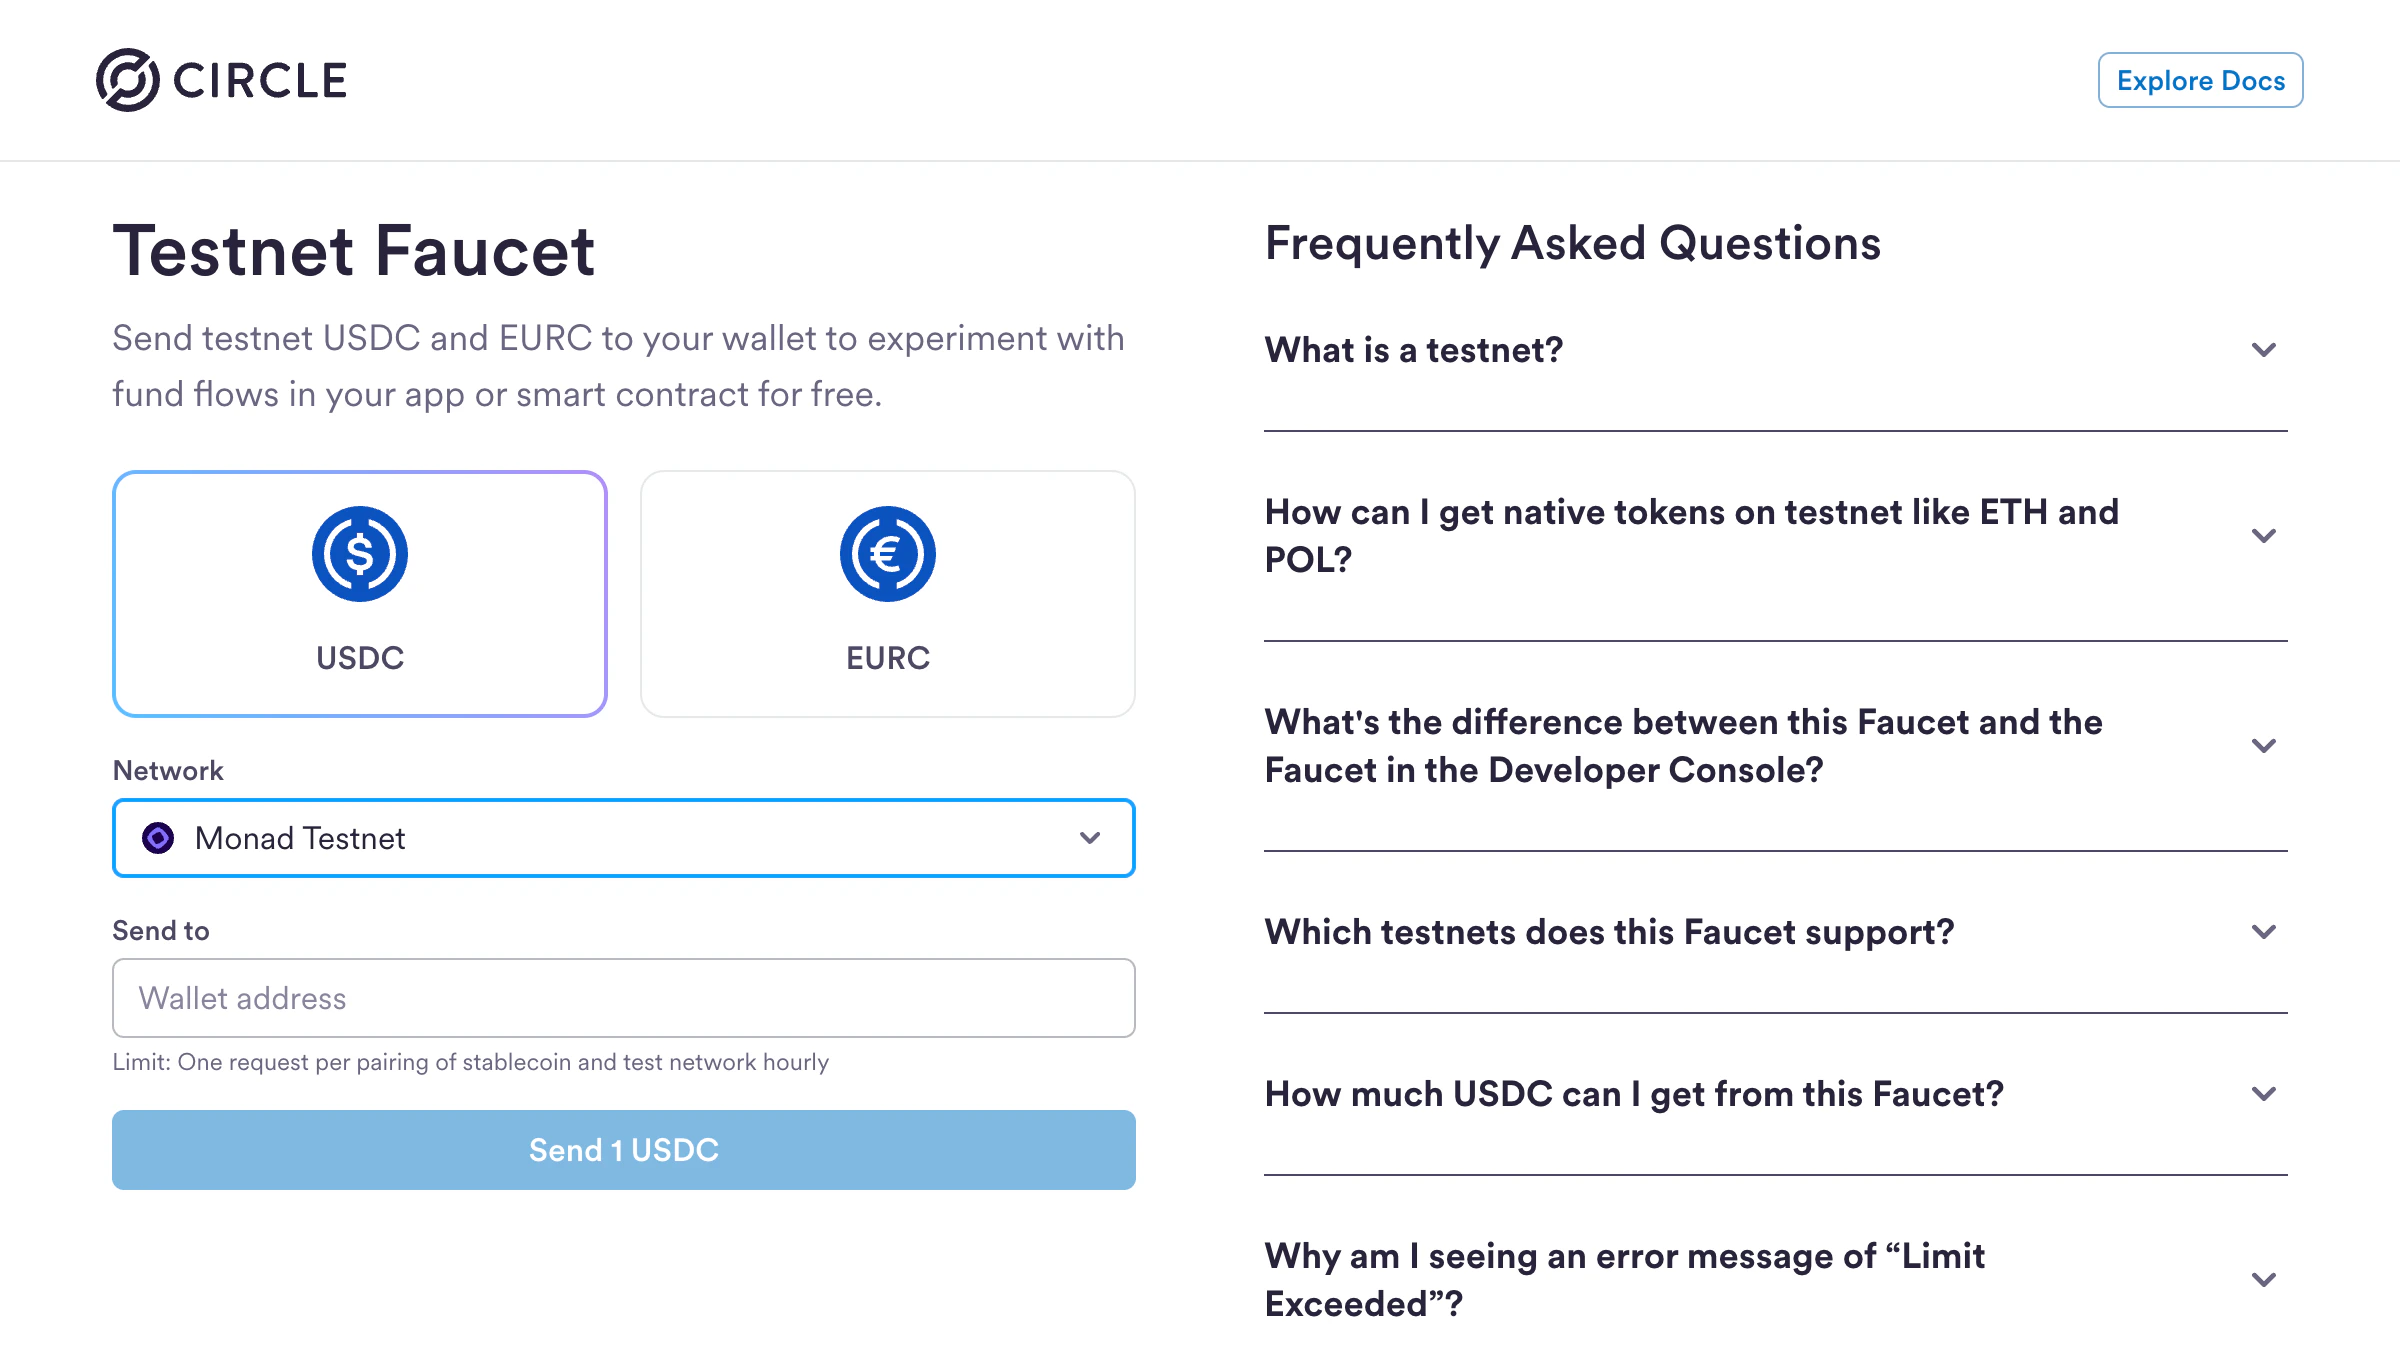
- Visit https://faucet.circle.com
- Select USDC as the token
- Select Monad Testnet from the Network dropdown
- Enter your wallet address
- Click Send 1 USDC
Step 1: Initialize a Next.js App
Create a new Next.js project:- ✅ TypeScript
- ✅ ESLint
- ✅ Tailwind CSS
- ✅
src/directory - ✅ App Router
- ✅ Customize default import alias:
@/*(default)
Install x402 packages with version
2.2.0 and above..env.local file for your environment variables:
Step 2: Create a payTo address
A payTo address is used to receive payments and interact with the blockchain from your backend.
Copy the wallet address and add it to your .env.local file as PAY_TO_ADDRESS
Step 4: Create a server side payable endpoint
src/app/api/premium/route.ts
Step 5: Client-side setup (consuming paid endpoint)
Below is an example of consuming the paid endpoint using a Next.js app, however the endpoint can be consumed via an agent script as well.src/app/page.tsx
Running Your x402 App
Now you’re ready to test your x402 payment flow:-
Start your development server:
- Open http://localhost:3000 in your browser
- Click “Pay & Unlock Content”
- Connect your wallet
- Approve the USDC payment
- See the content unlock instantly!
Facilitator API
For developers who are interested in using the barebones Facilitator API, here are the supported endpoints with examples. Facilitator URL:https://x402-facilitator.molandak.org
Network support: Mainnet and Testnet.
GET /supported
Returns supported networks, schemes, and signer addresses.
POST /verify
Verify a payment signature.
POST /settle
Execute the payment on-chain. Facilitator pays gas.
What’s Next?
You’ve successfully built an x402 payment-enabled app on Monad! Here are some ideas to extend your implementation:- Add more payable endpoints - Create different pricing tiers for various content or API calls
- Build AI agent integrations - Enable autonomous agents to pay for and access your APIs