app directory. This project uses file-based routing.
This template also has a
demo branch that you can switch to in order to view the demo project.You can switch using the following command:Prerequisites
- Node.js
- NPM
- Expo CLI (Install using the following command:
npm i -g expo-cli) - a Privy account
For Android
For Android
- Android Studio (API version 35 and above)
- Guide to setup Android Studio for Expo is available here
Setting up the Privy account
Setting up the Privy account
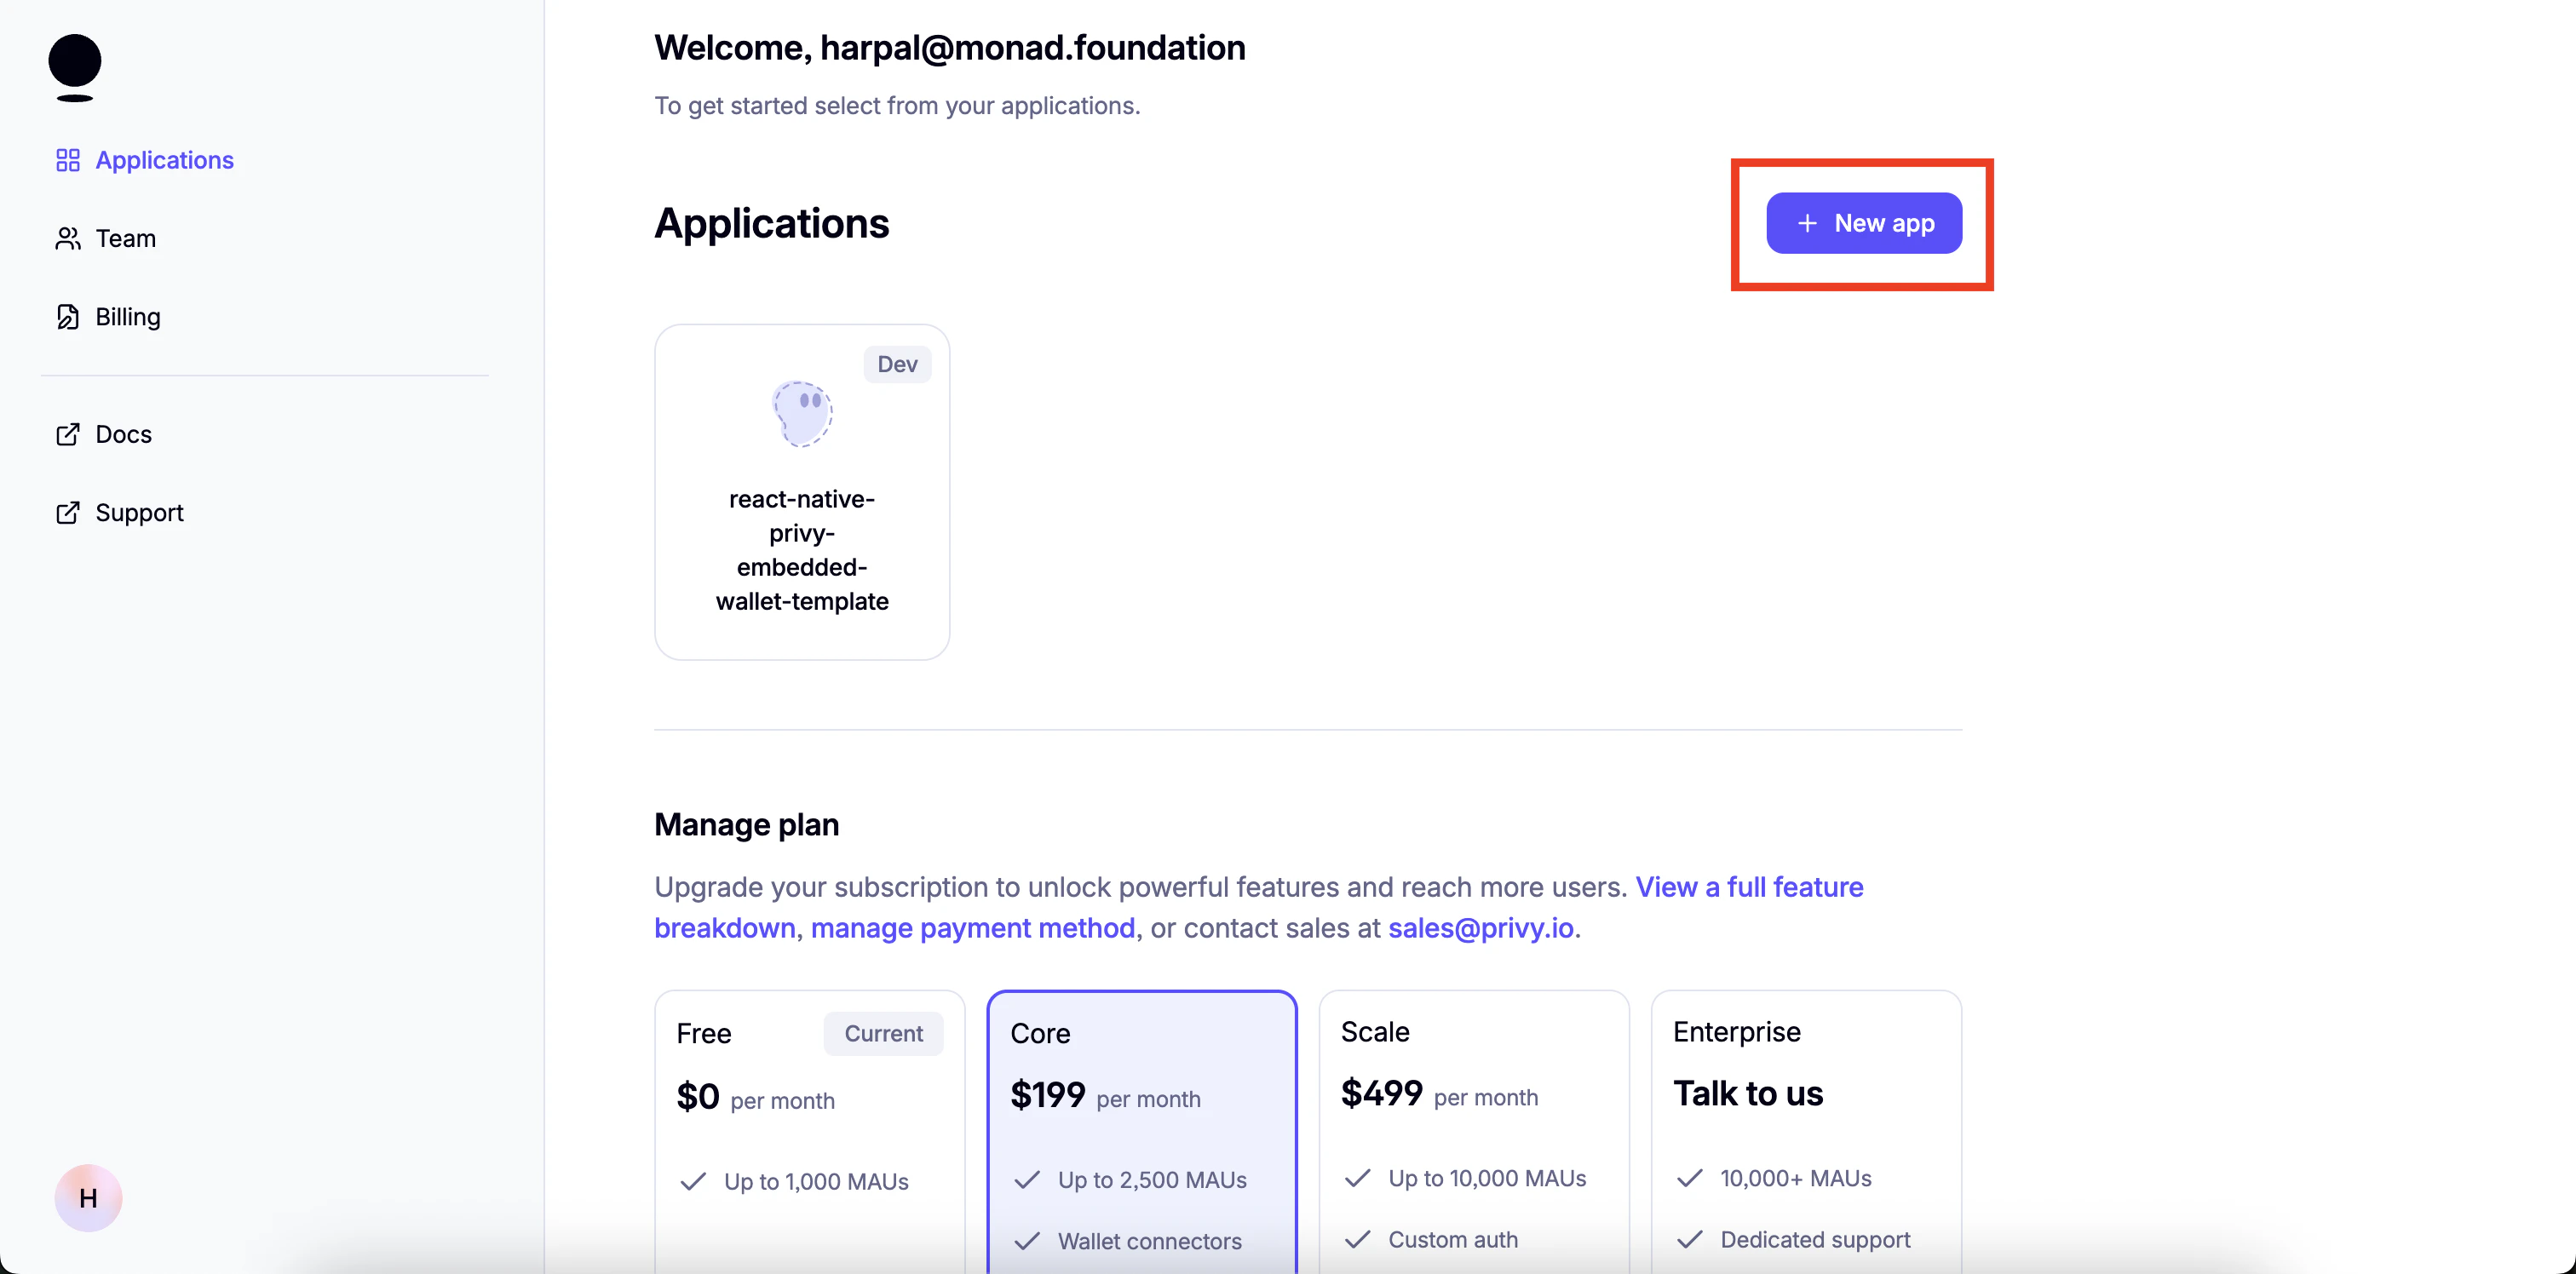
- Create app:

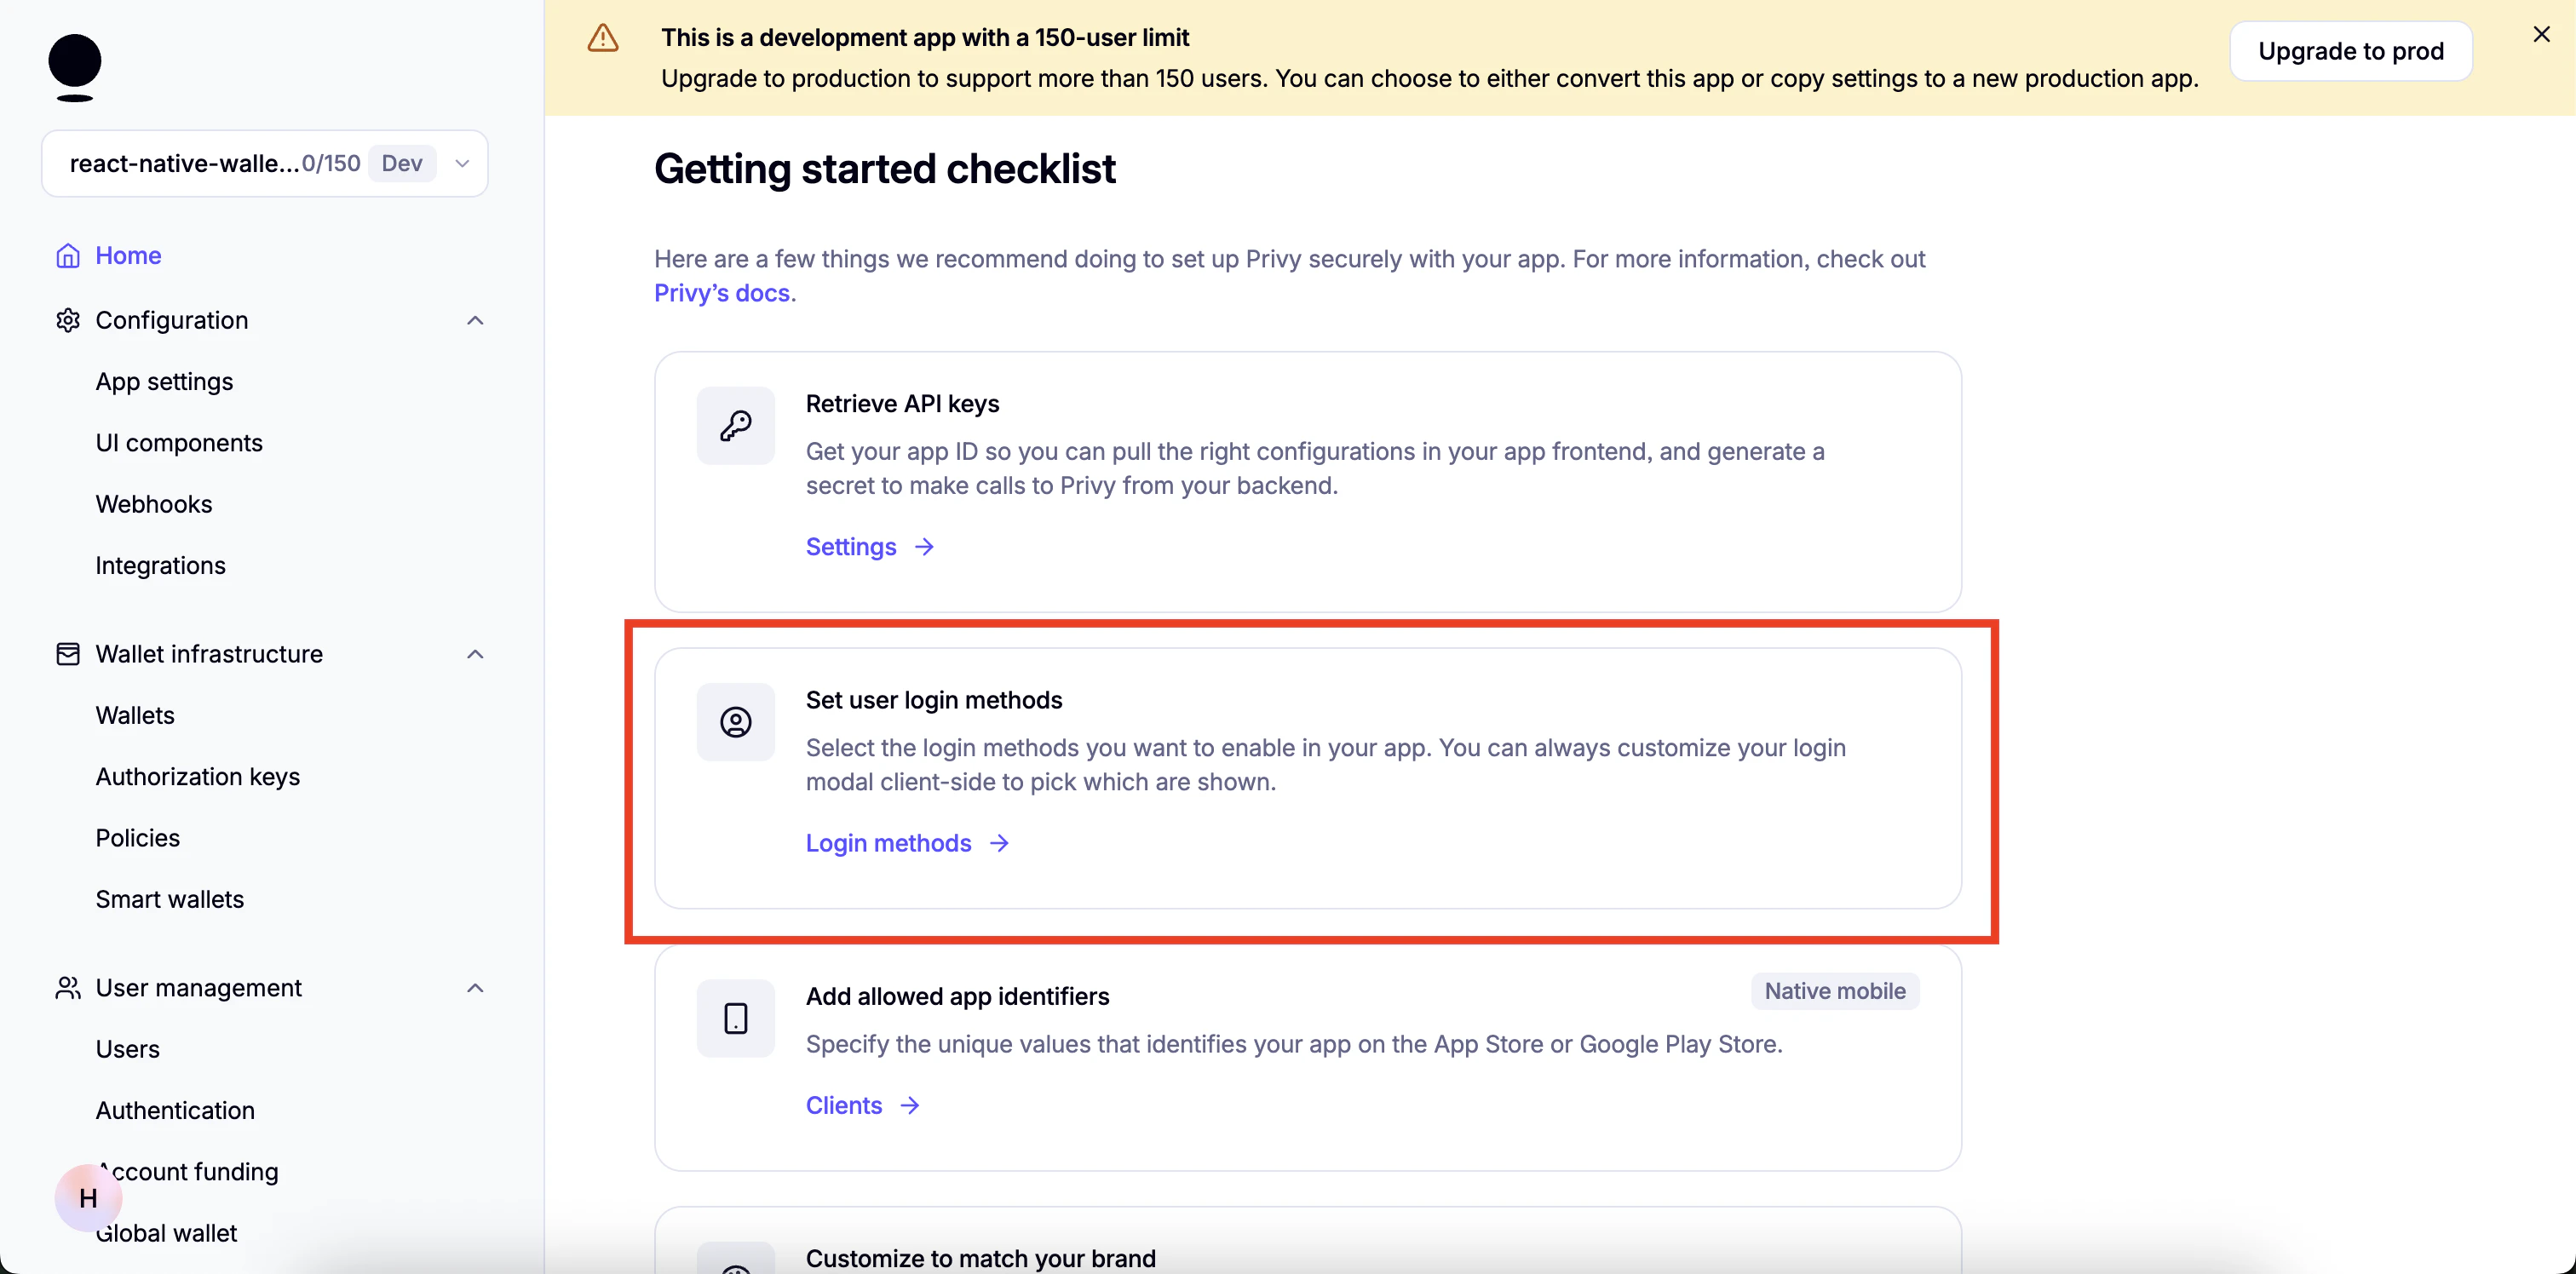
- Set up login methods:
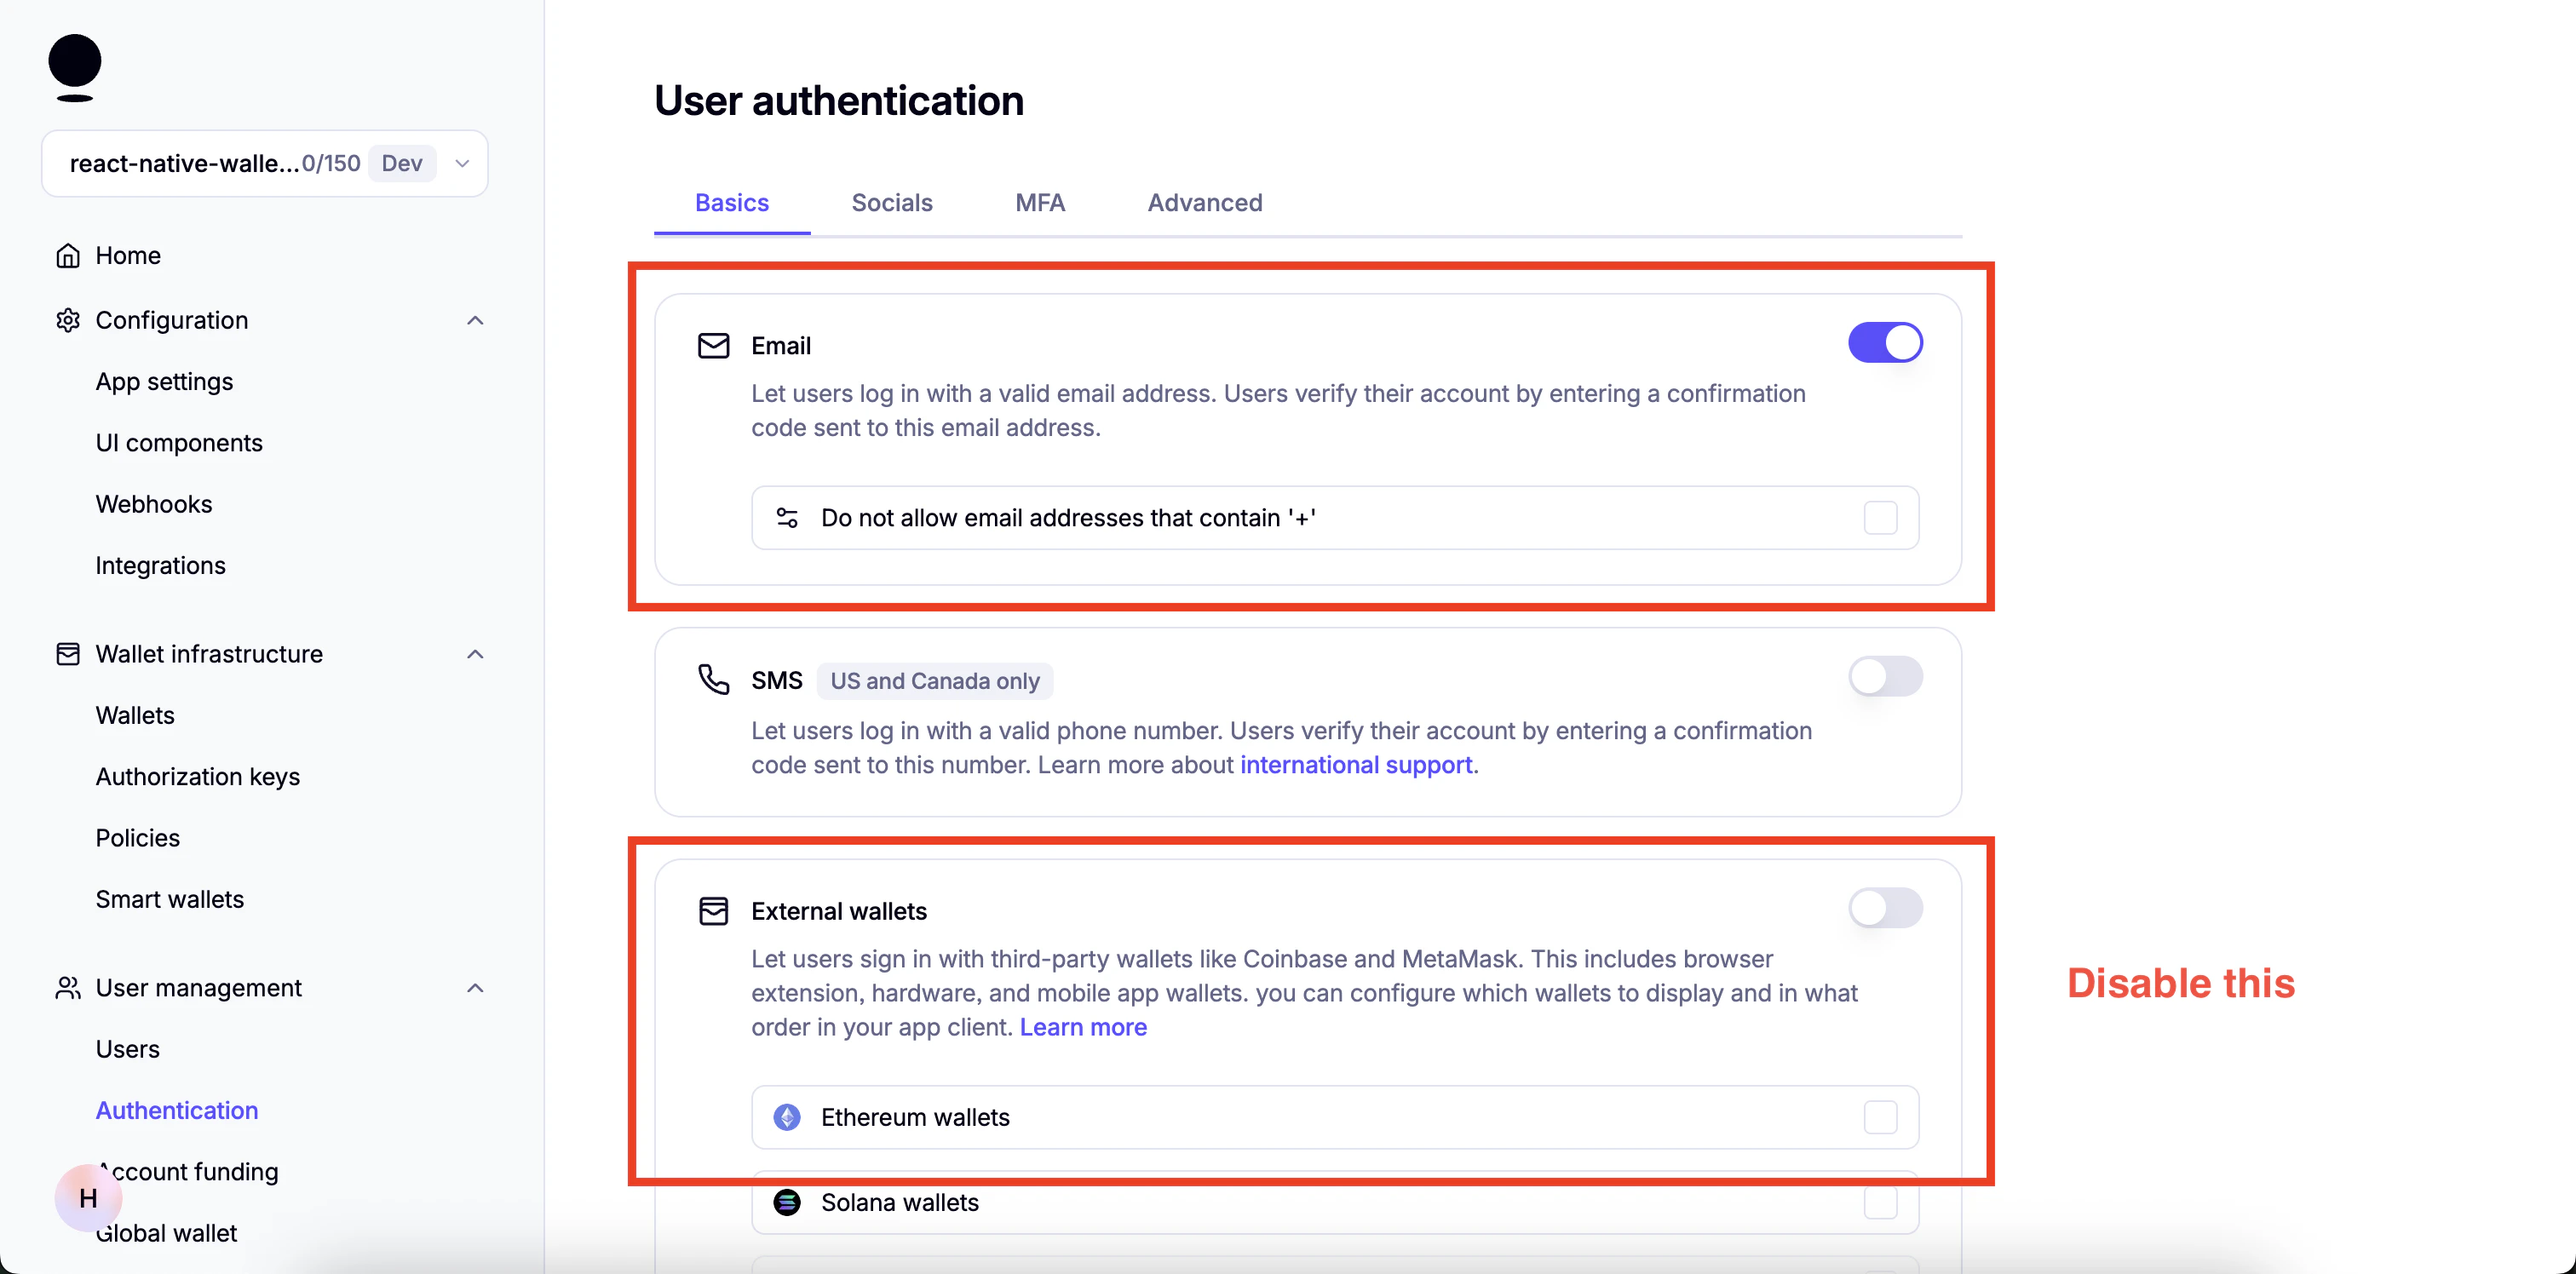
- Enable email:
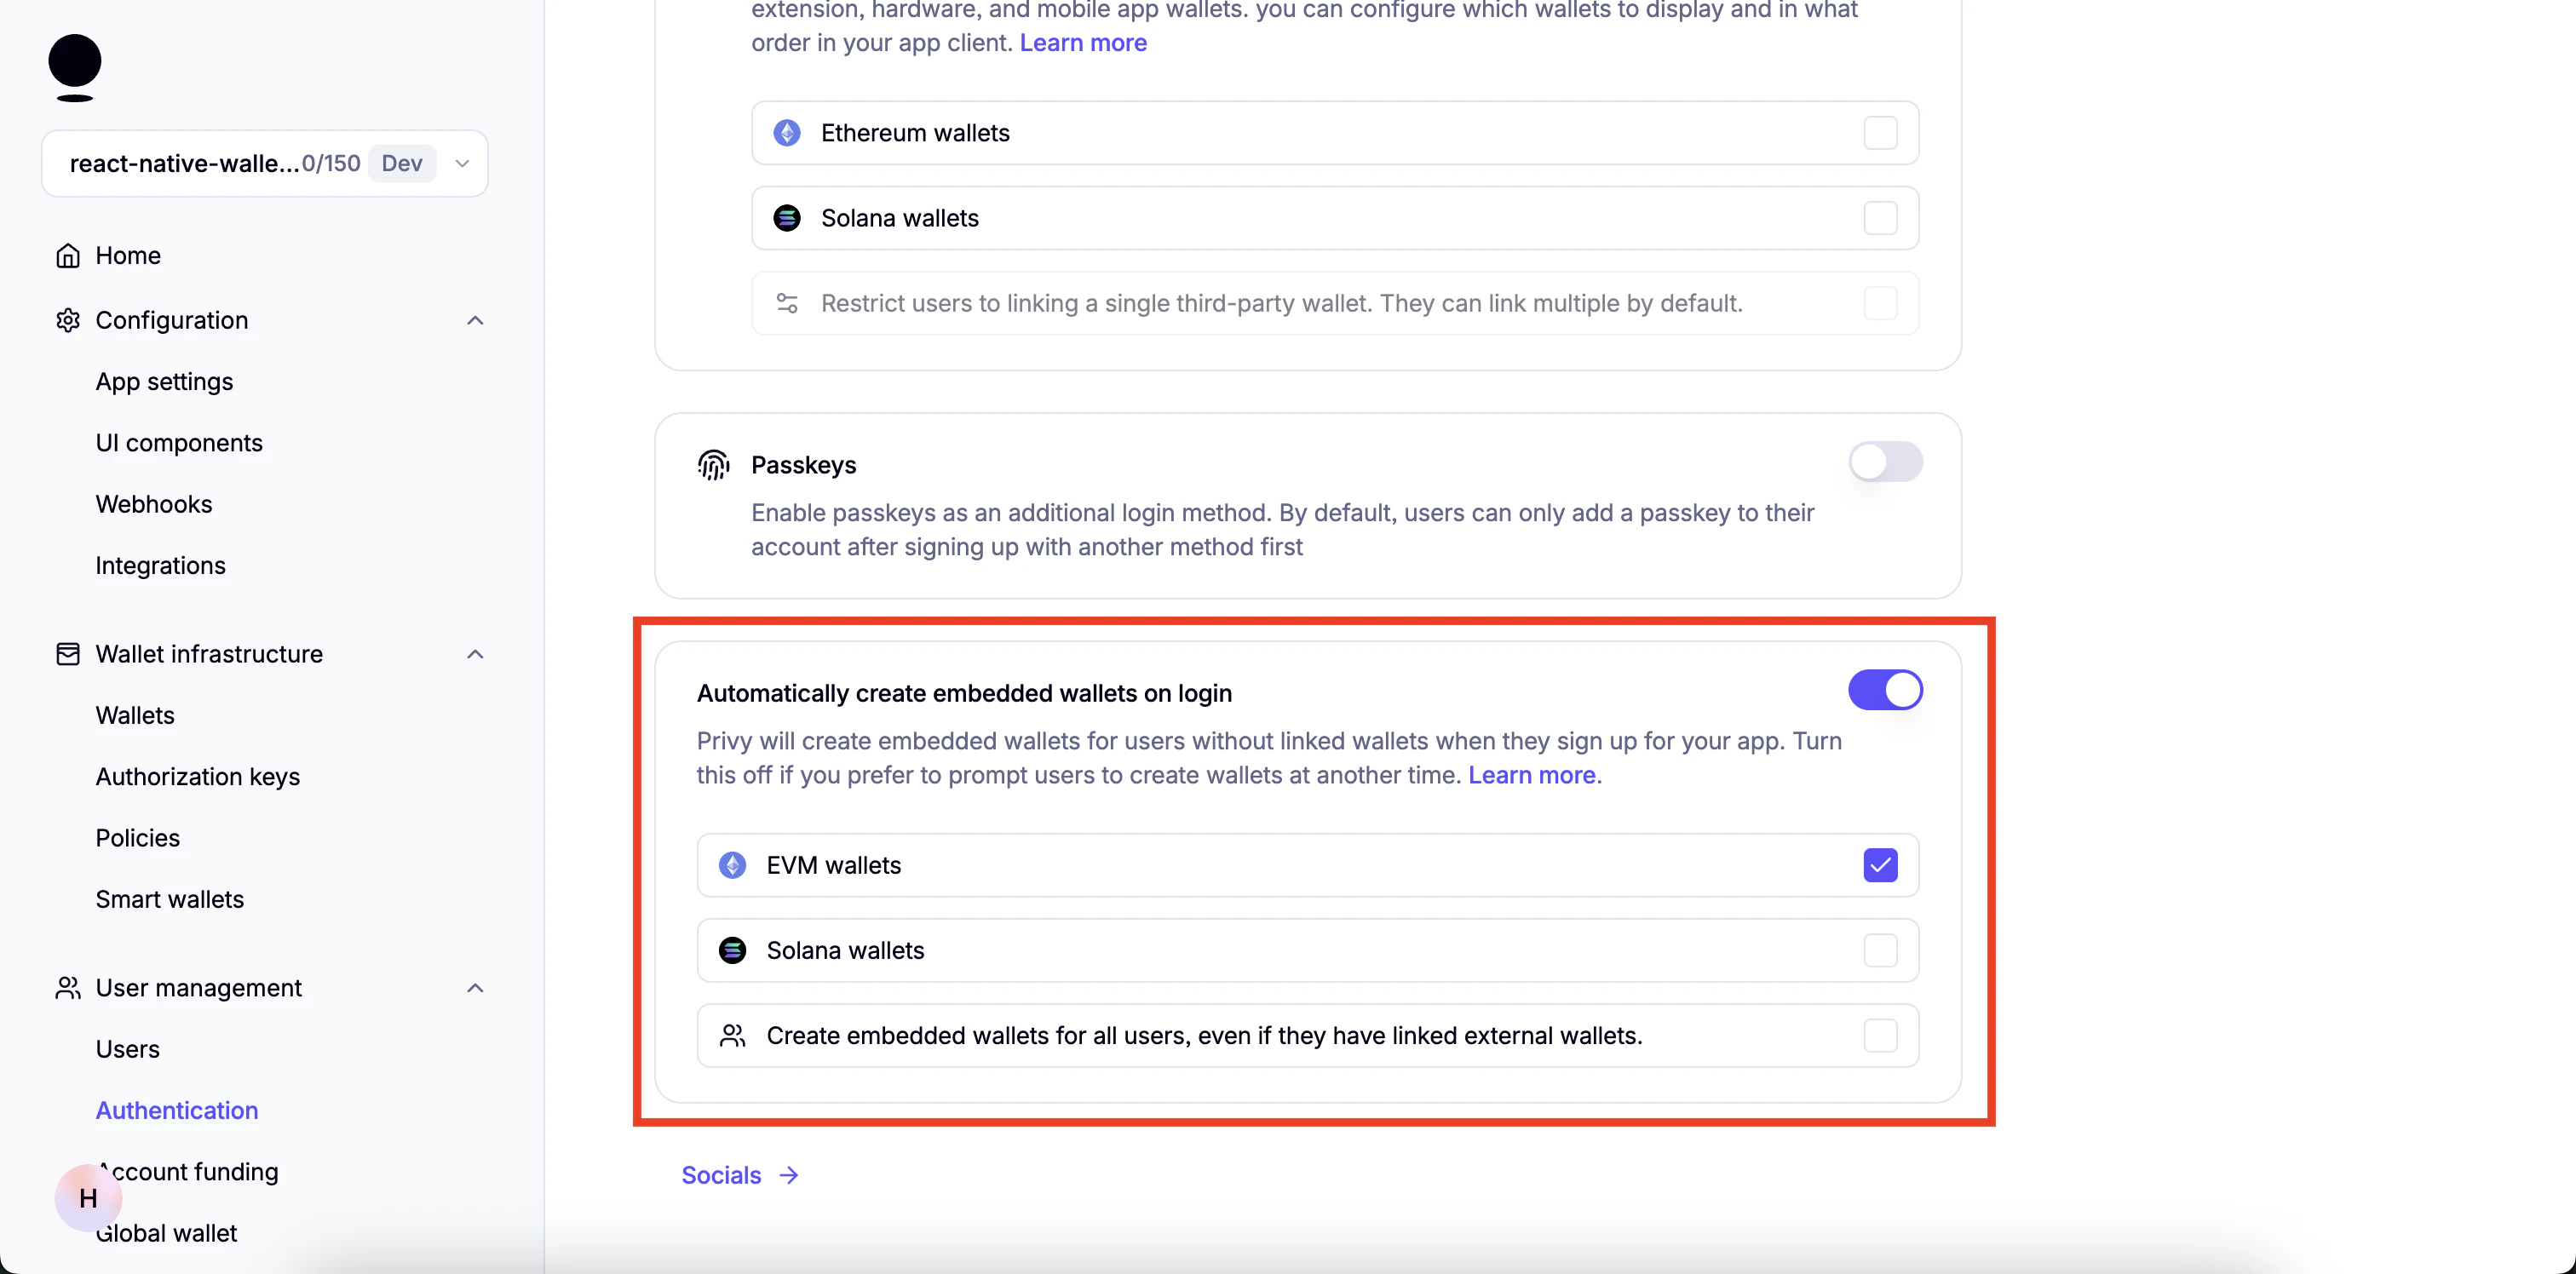
- Enable “Automatically create embedded wallets on login” and select “EVM Wallets”:
- Disable everything in Socials.
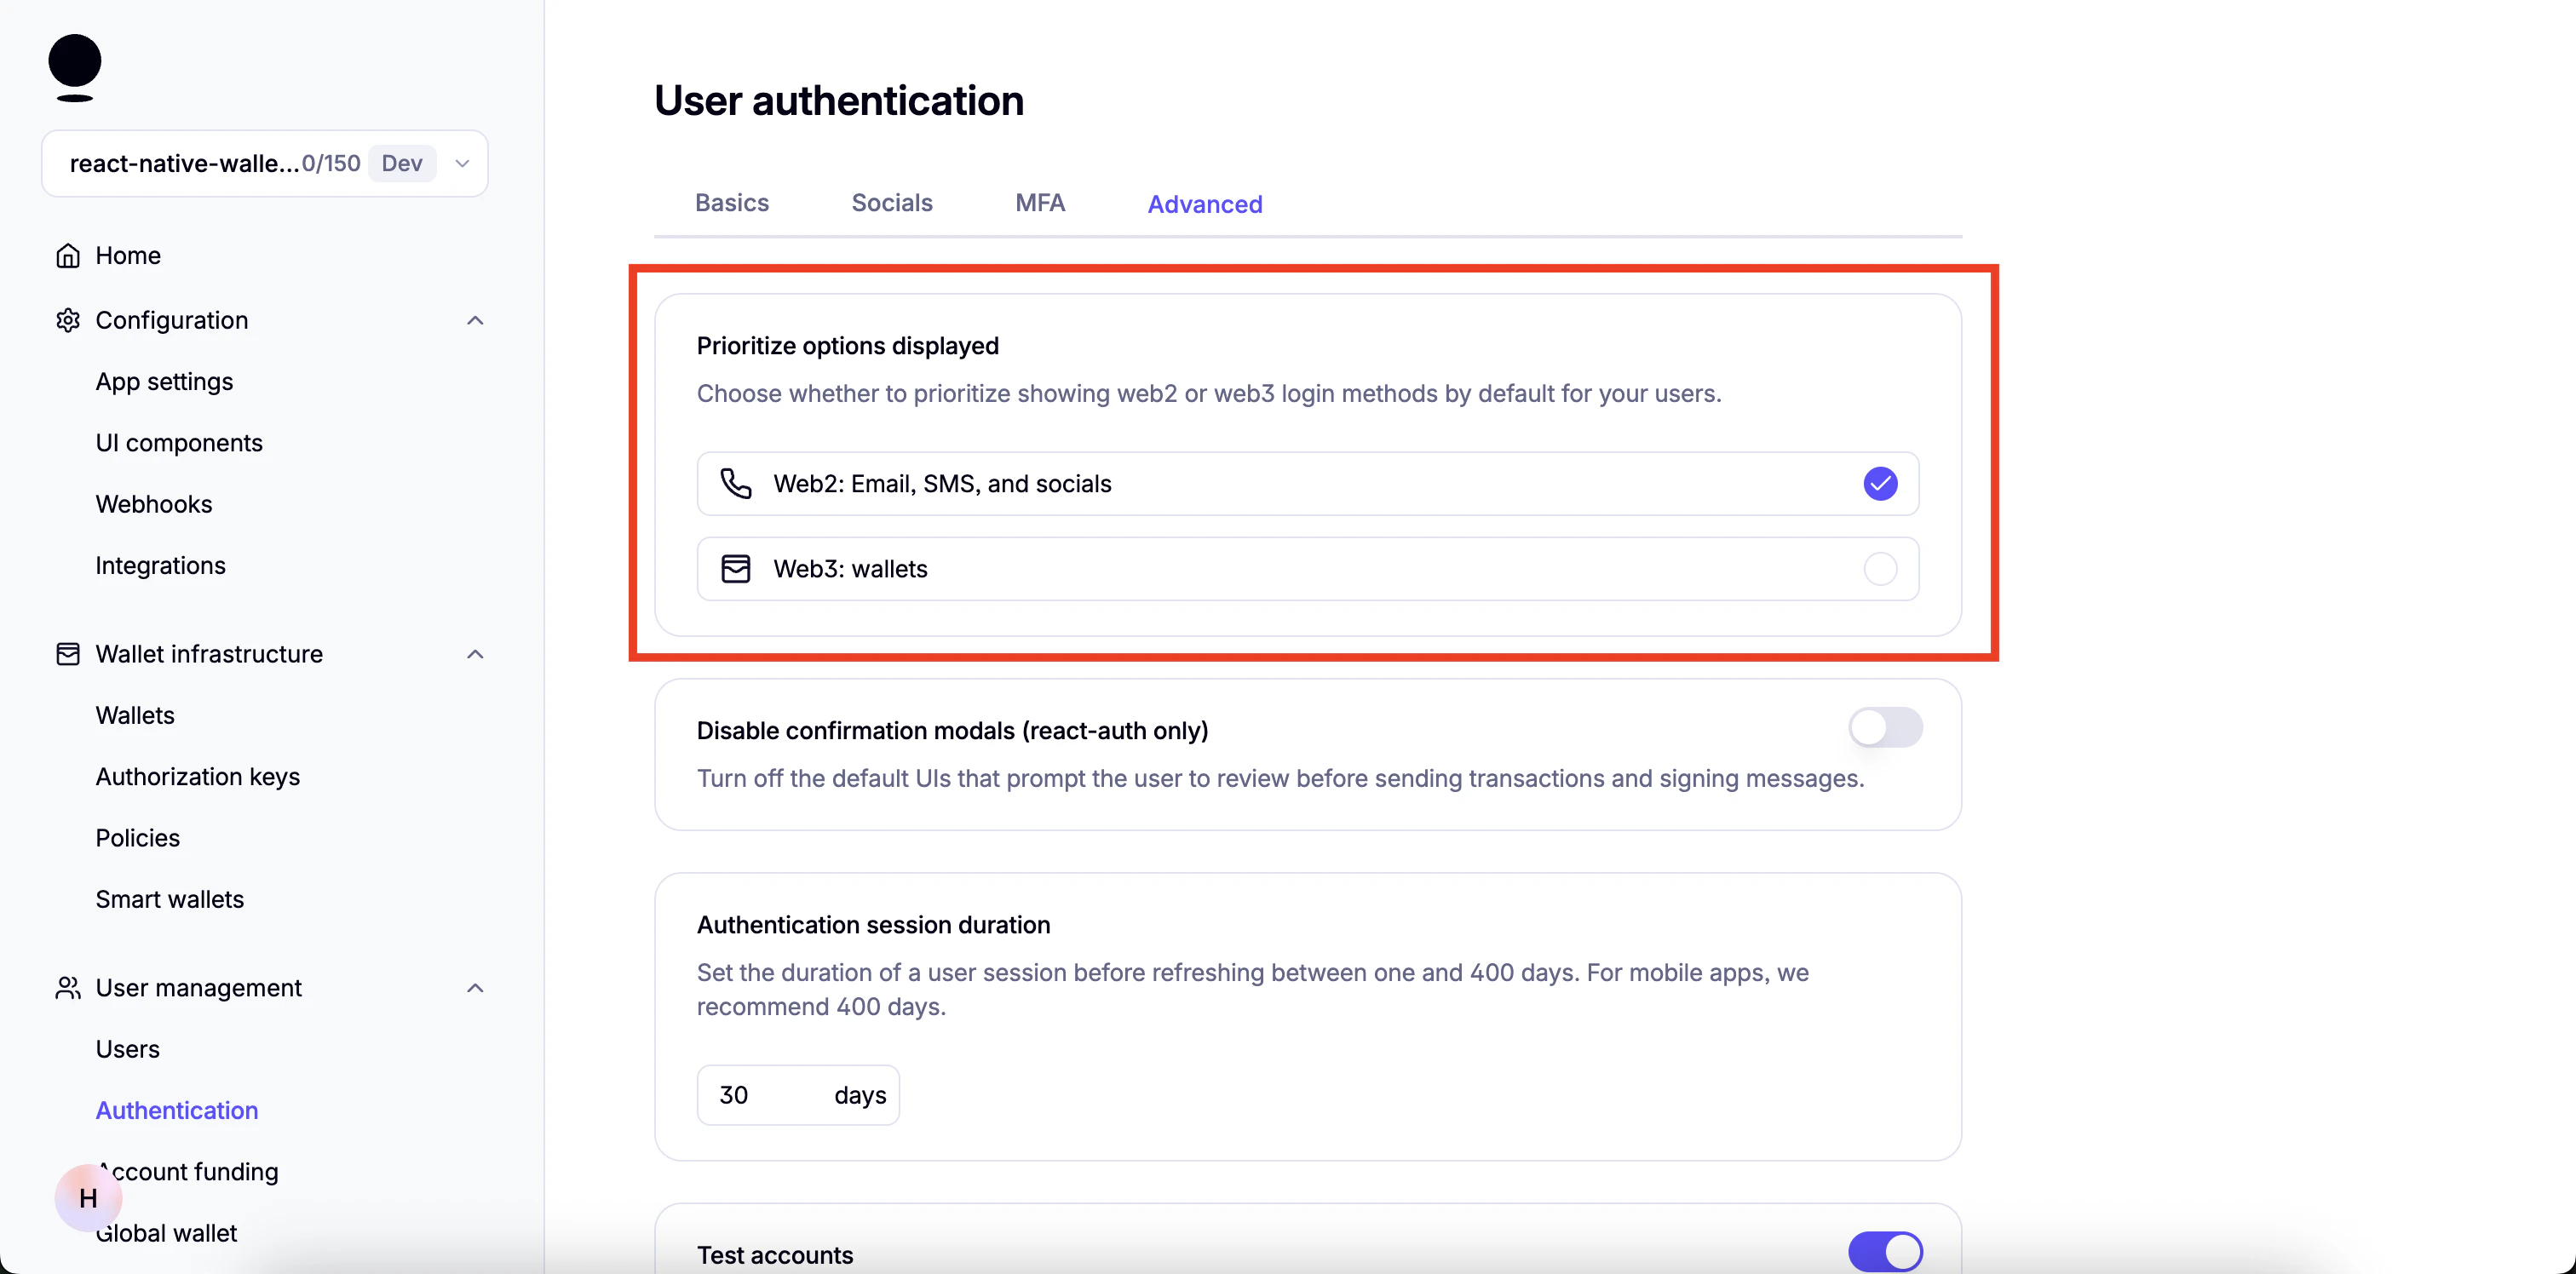
- Go to “Advanced” and Make sure only “Web2: Email, SMS, and socials” under “Prioritize options displayed” is enabled:
- Tip: You can enable “Test Accounts” for testing purposes:

- A few more steps are required but we will continue once the dependencies for the project are installed.
Get started
This template also has a
demo branch that you can switch to in order to view the demo project.You can switch using the following command:Install dependencies
Set up the environment variables
- Create a copy of
.env.example
- Add the following environment variables to it
How to get `EXPO_PUBLIC_PRIVY_APP_ID`
How to get `EXPO_PUBLIC_PRIVY_APP_ID`
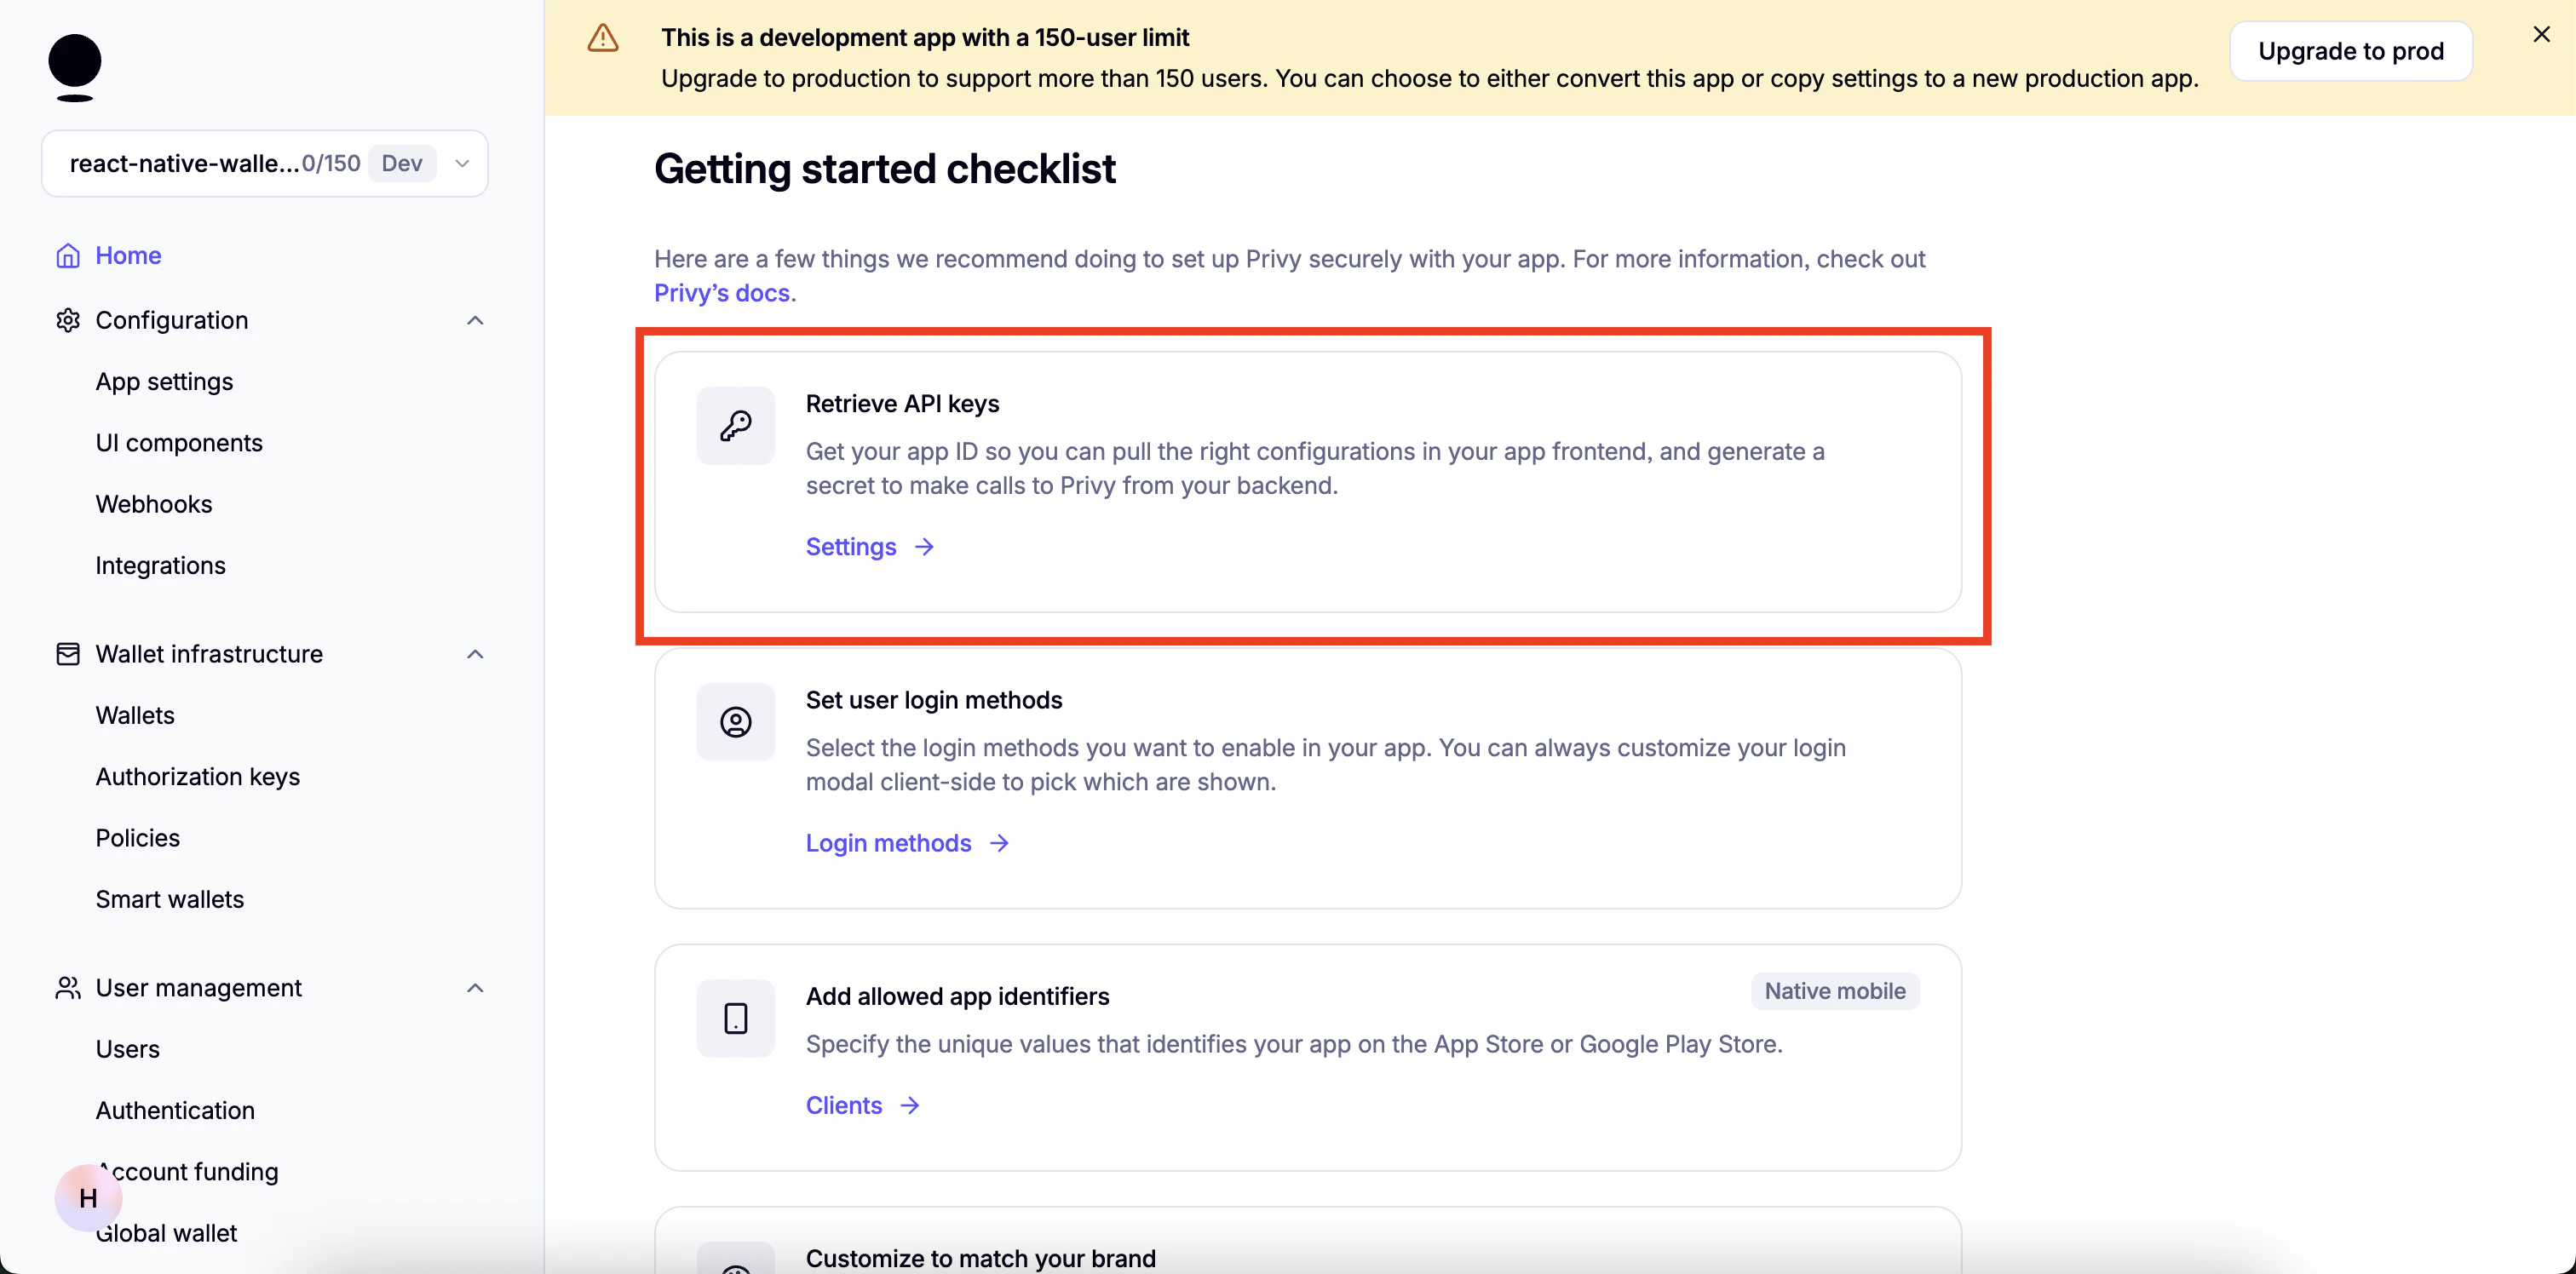
- Go to your Privy Dashboard and click on
Homefor your Privy app and click onRetrieve API keys.
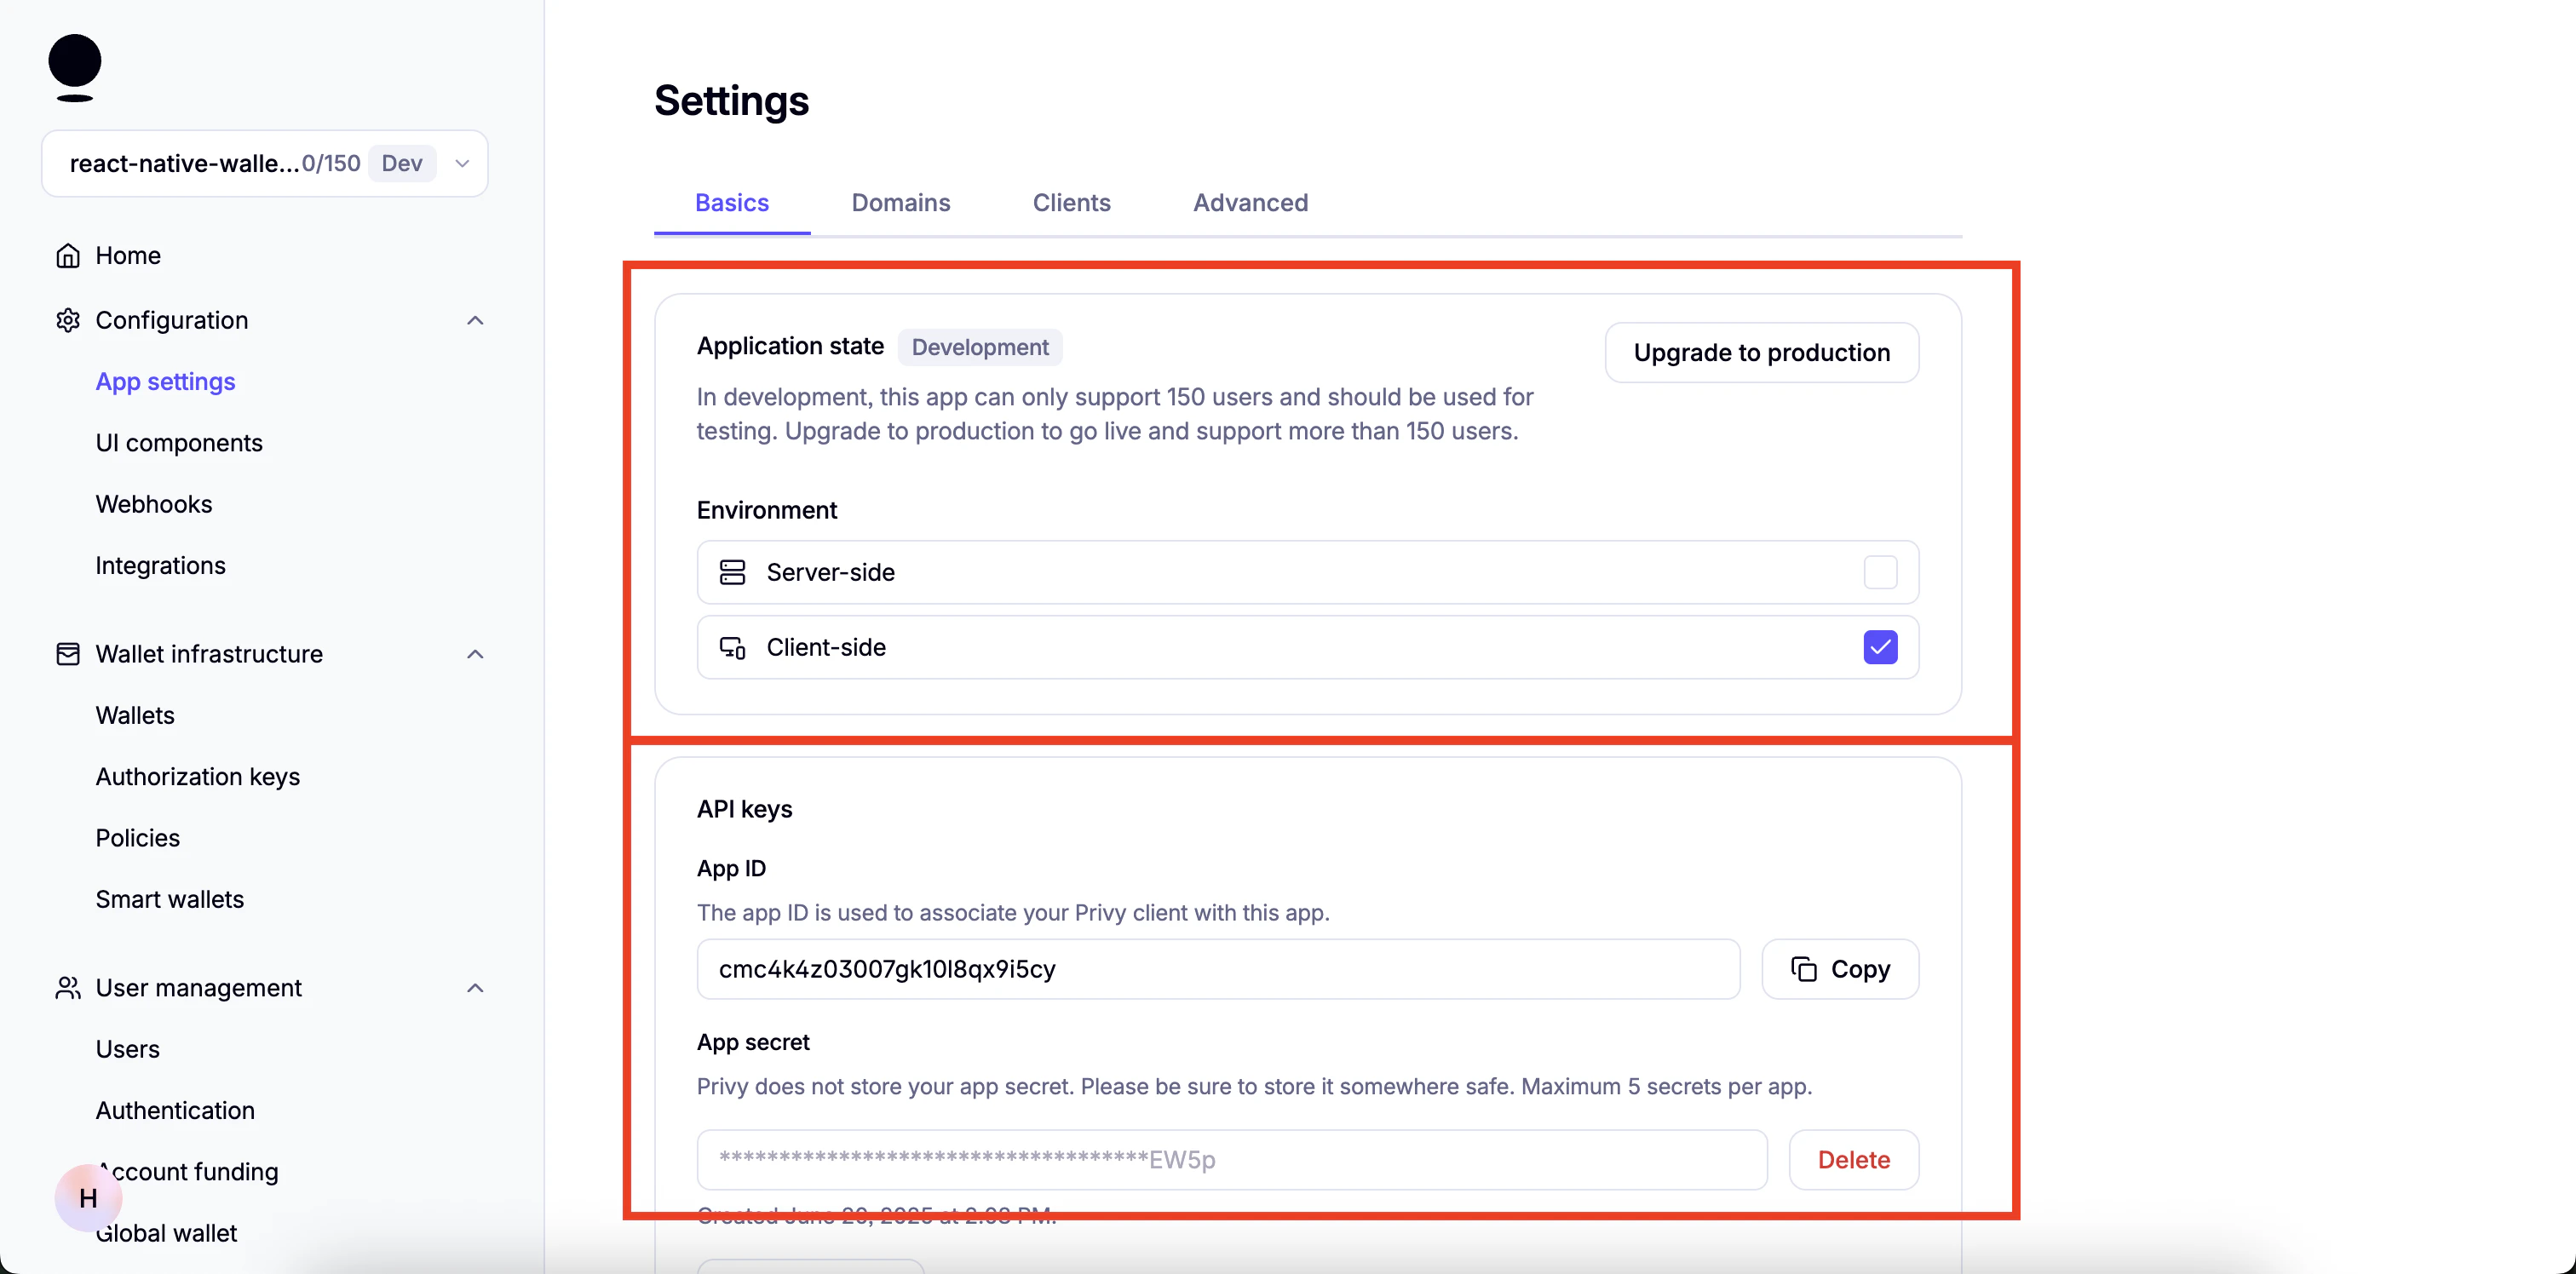
- You will find
App IDunderAPI keys.
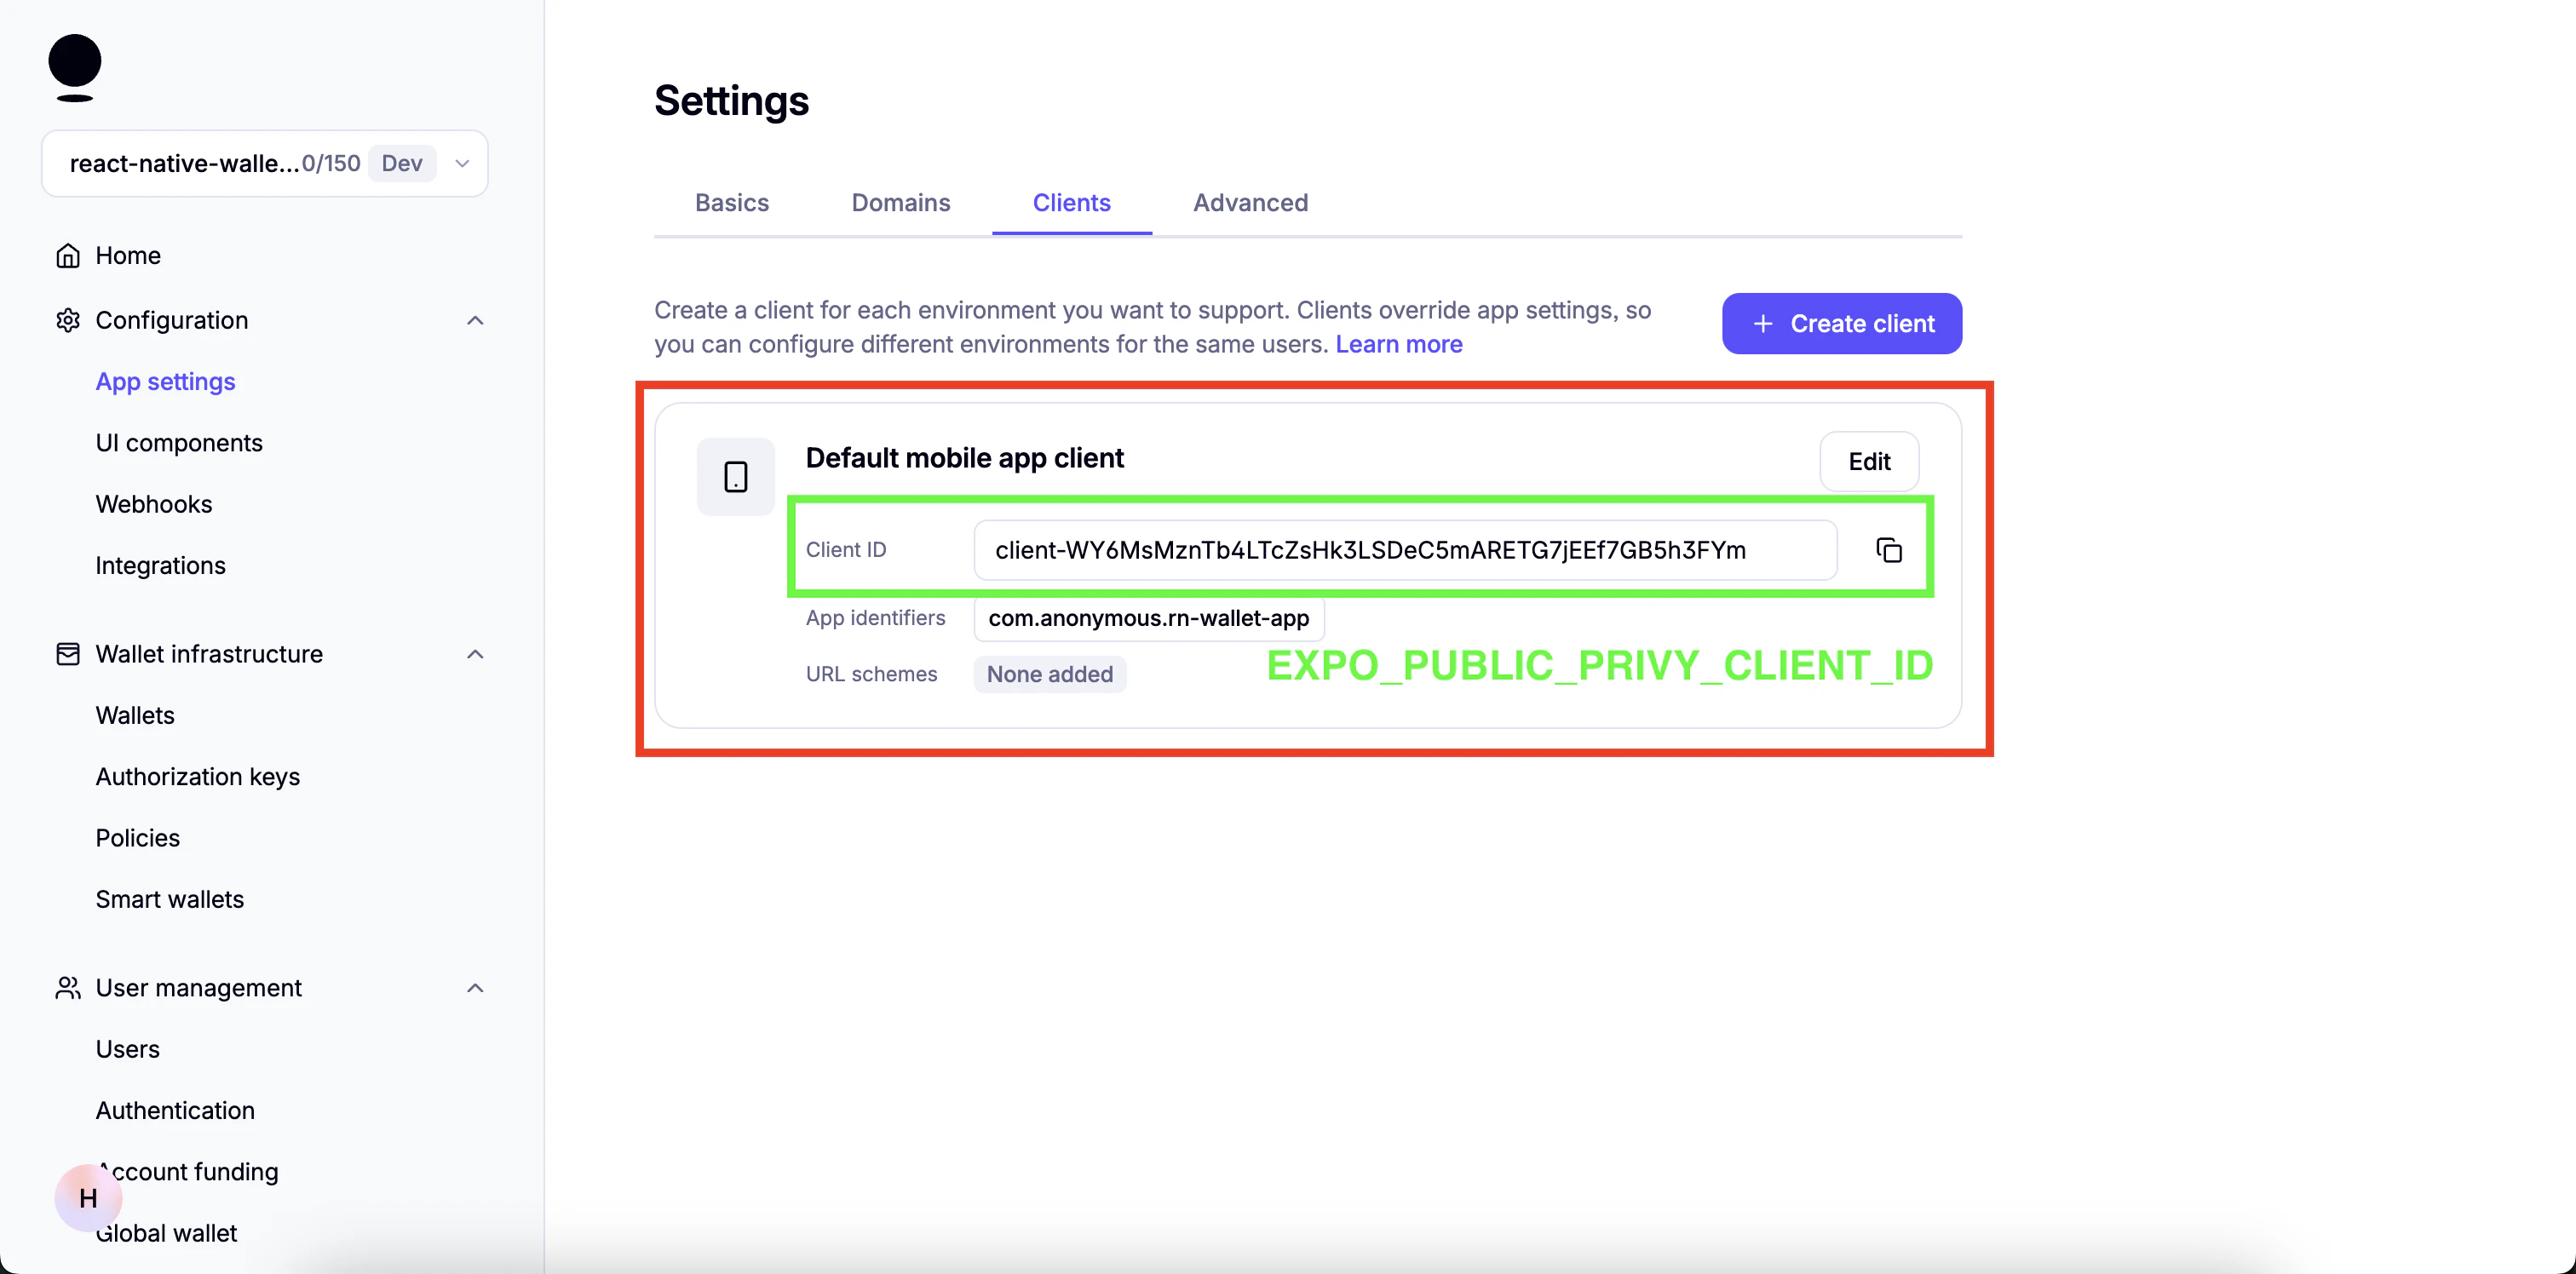
How to get `EXPO_PUBLIC_PRIVY_CLIENT_ID`
How to get `EXPO_PUBLIC_PRIVY_CLIENT_ID`
- Go to your Privy Dashboard and click on “Home” for your Privy app and click on
Retrieve API keys.
- Click on the
Clientstab at the top and click onEdit.
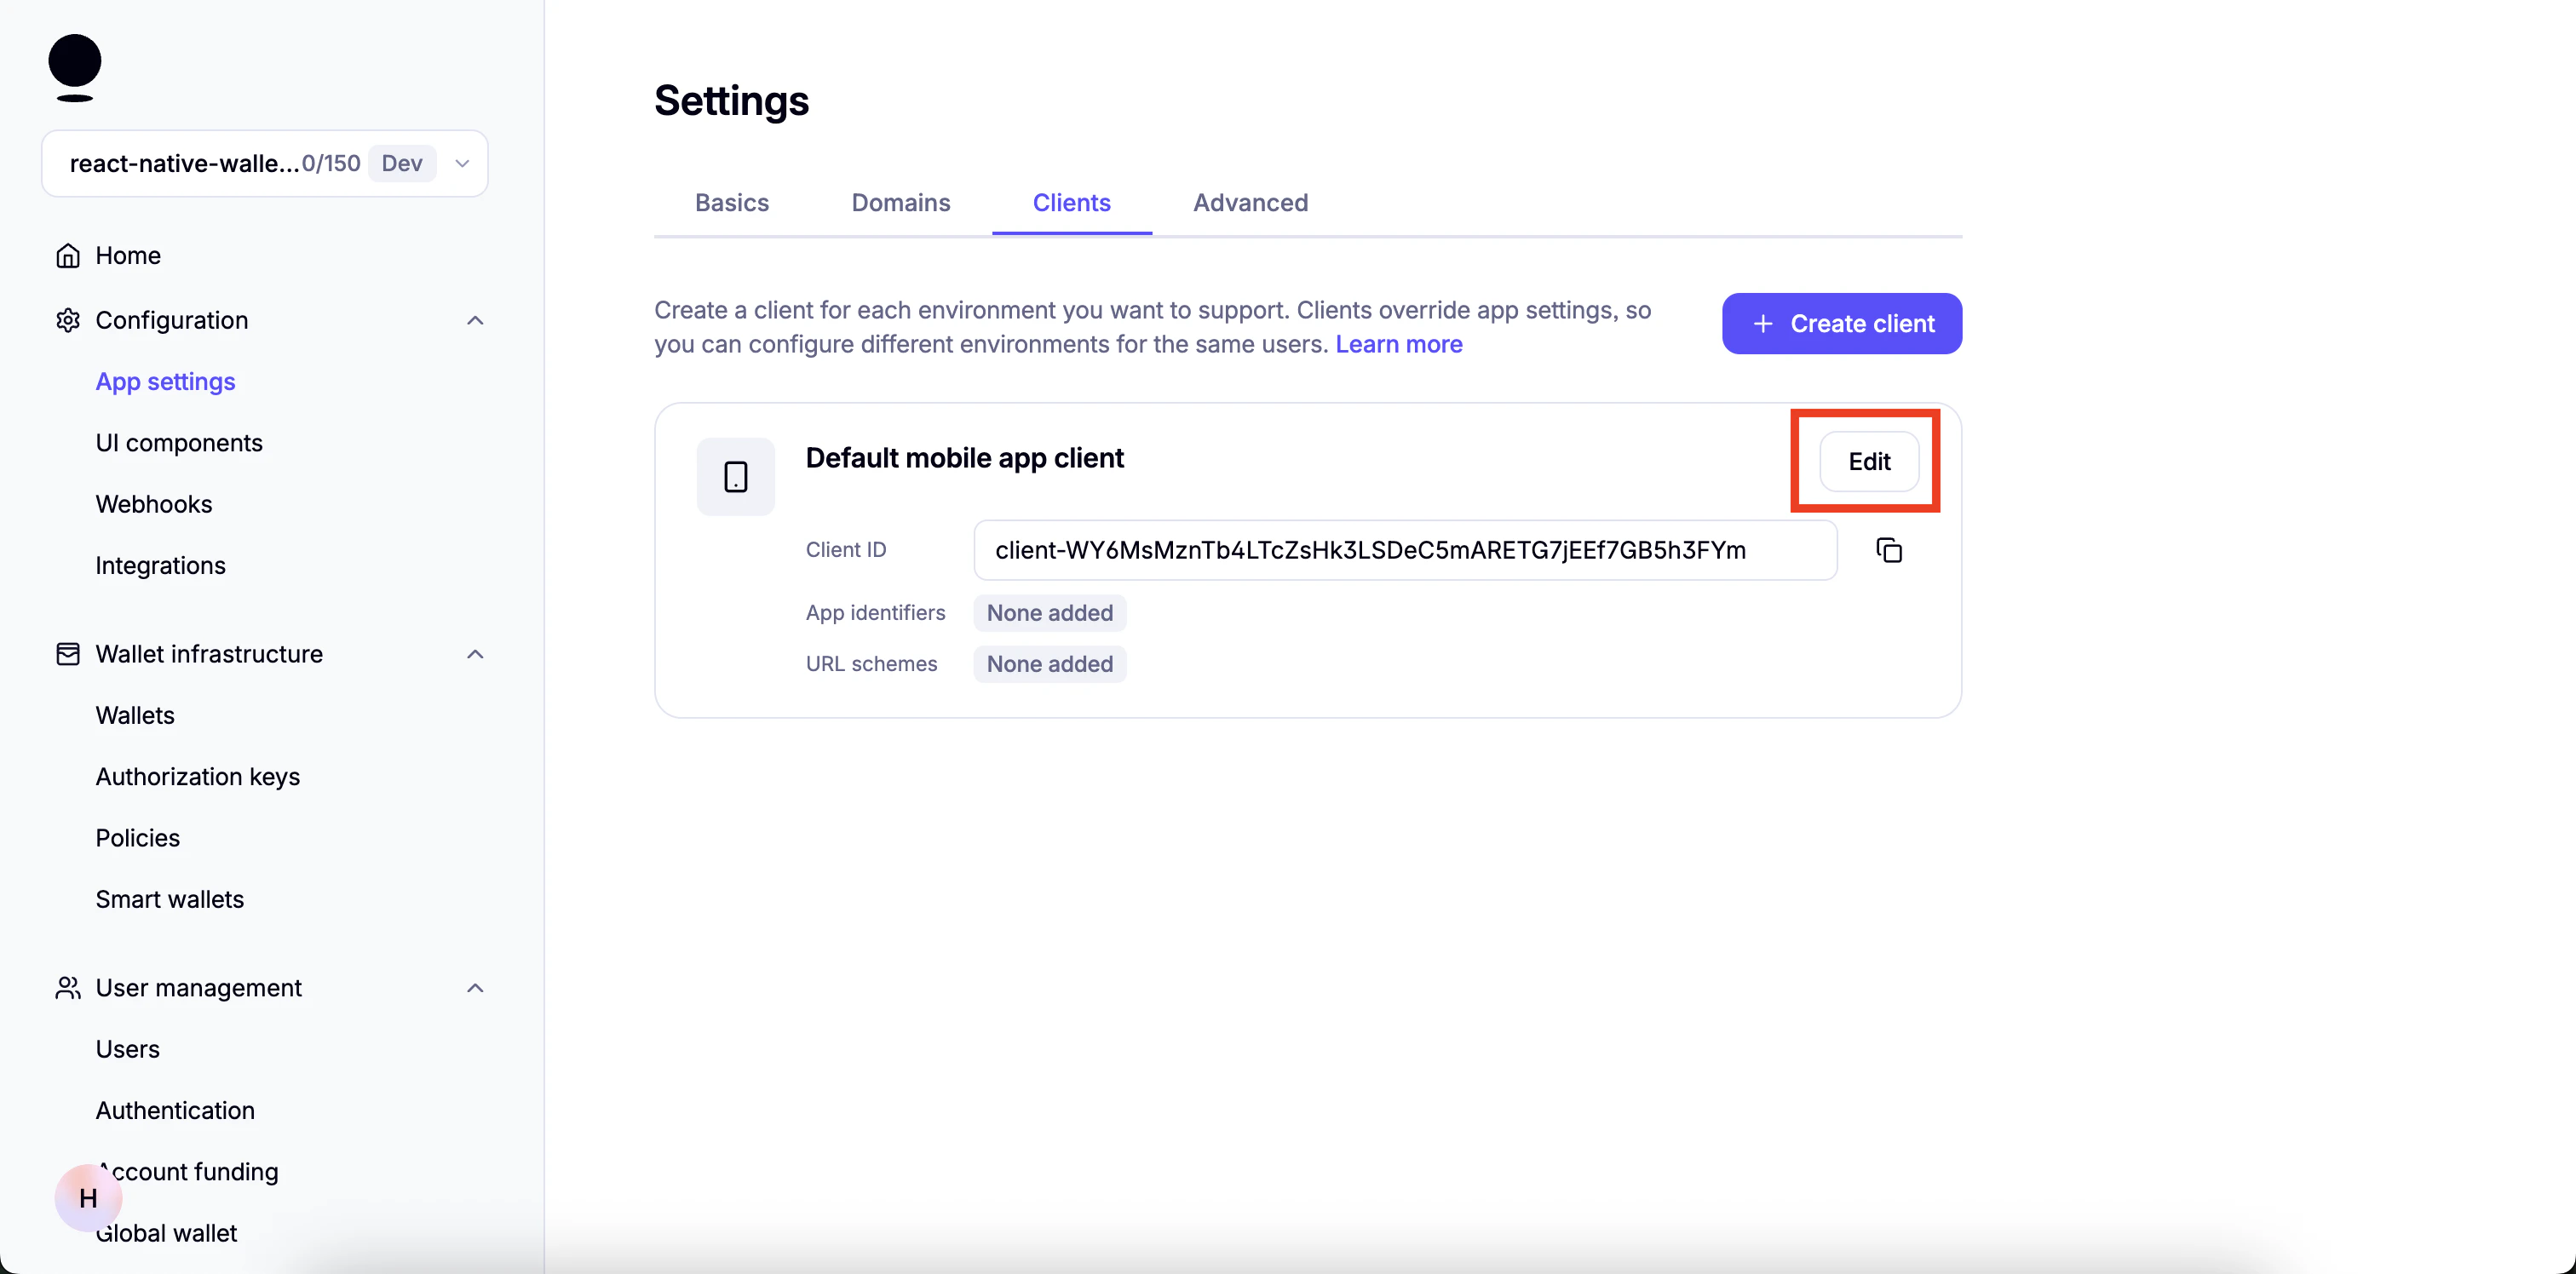
- Under
Allowed app identifierspaste the name of the app bundle and clickAdd
app.json for Android it is package property and iOS it is the bundleIdentifier property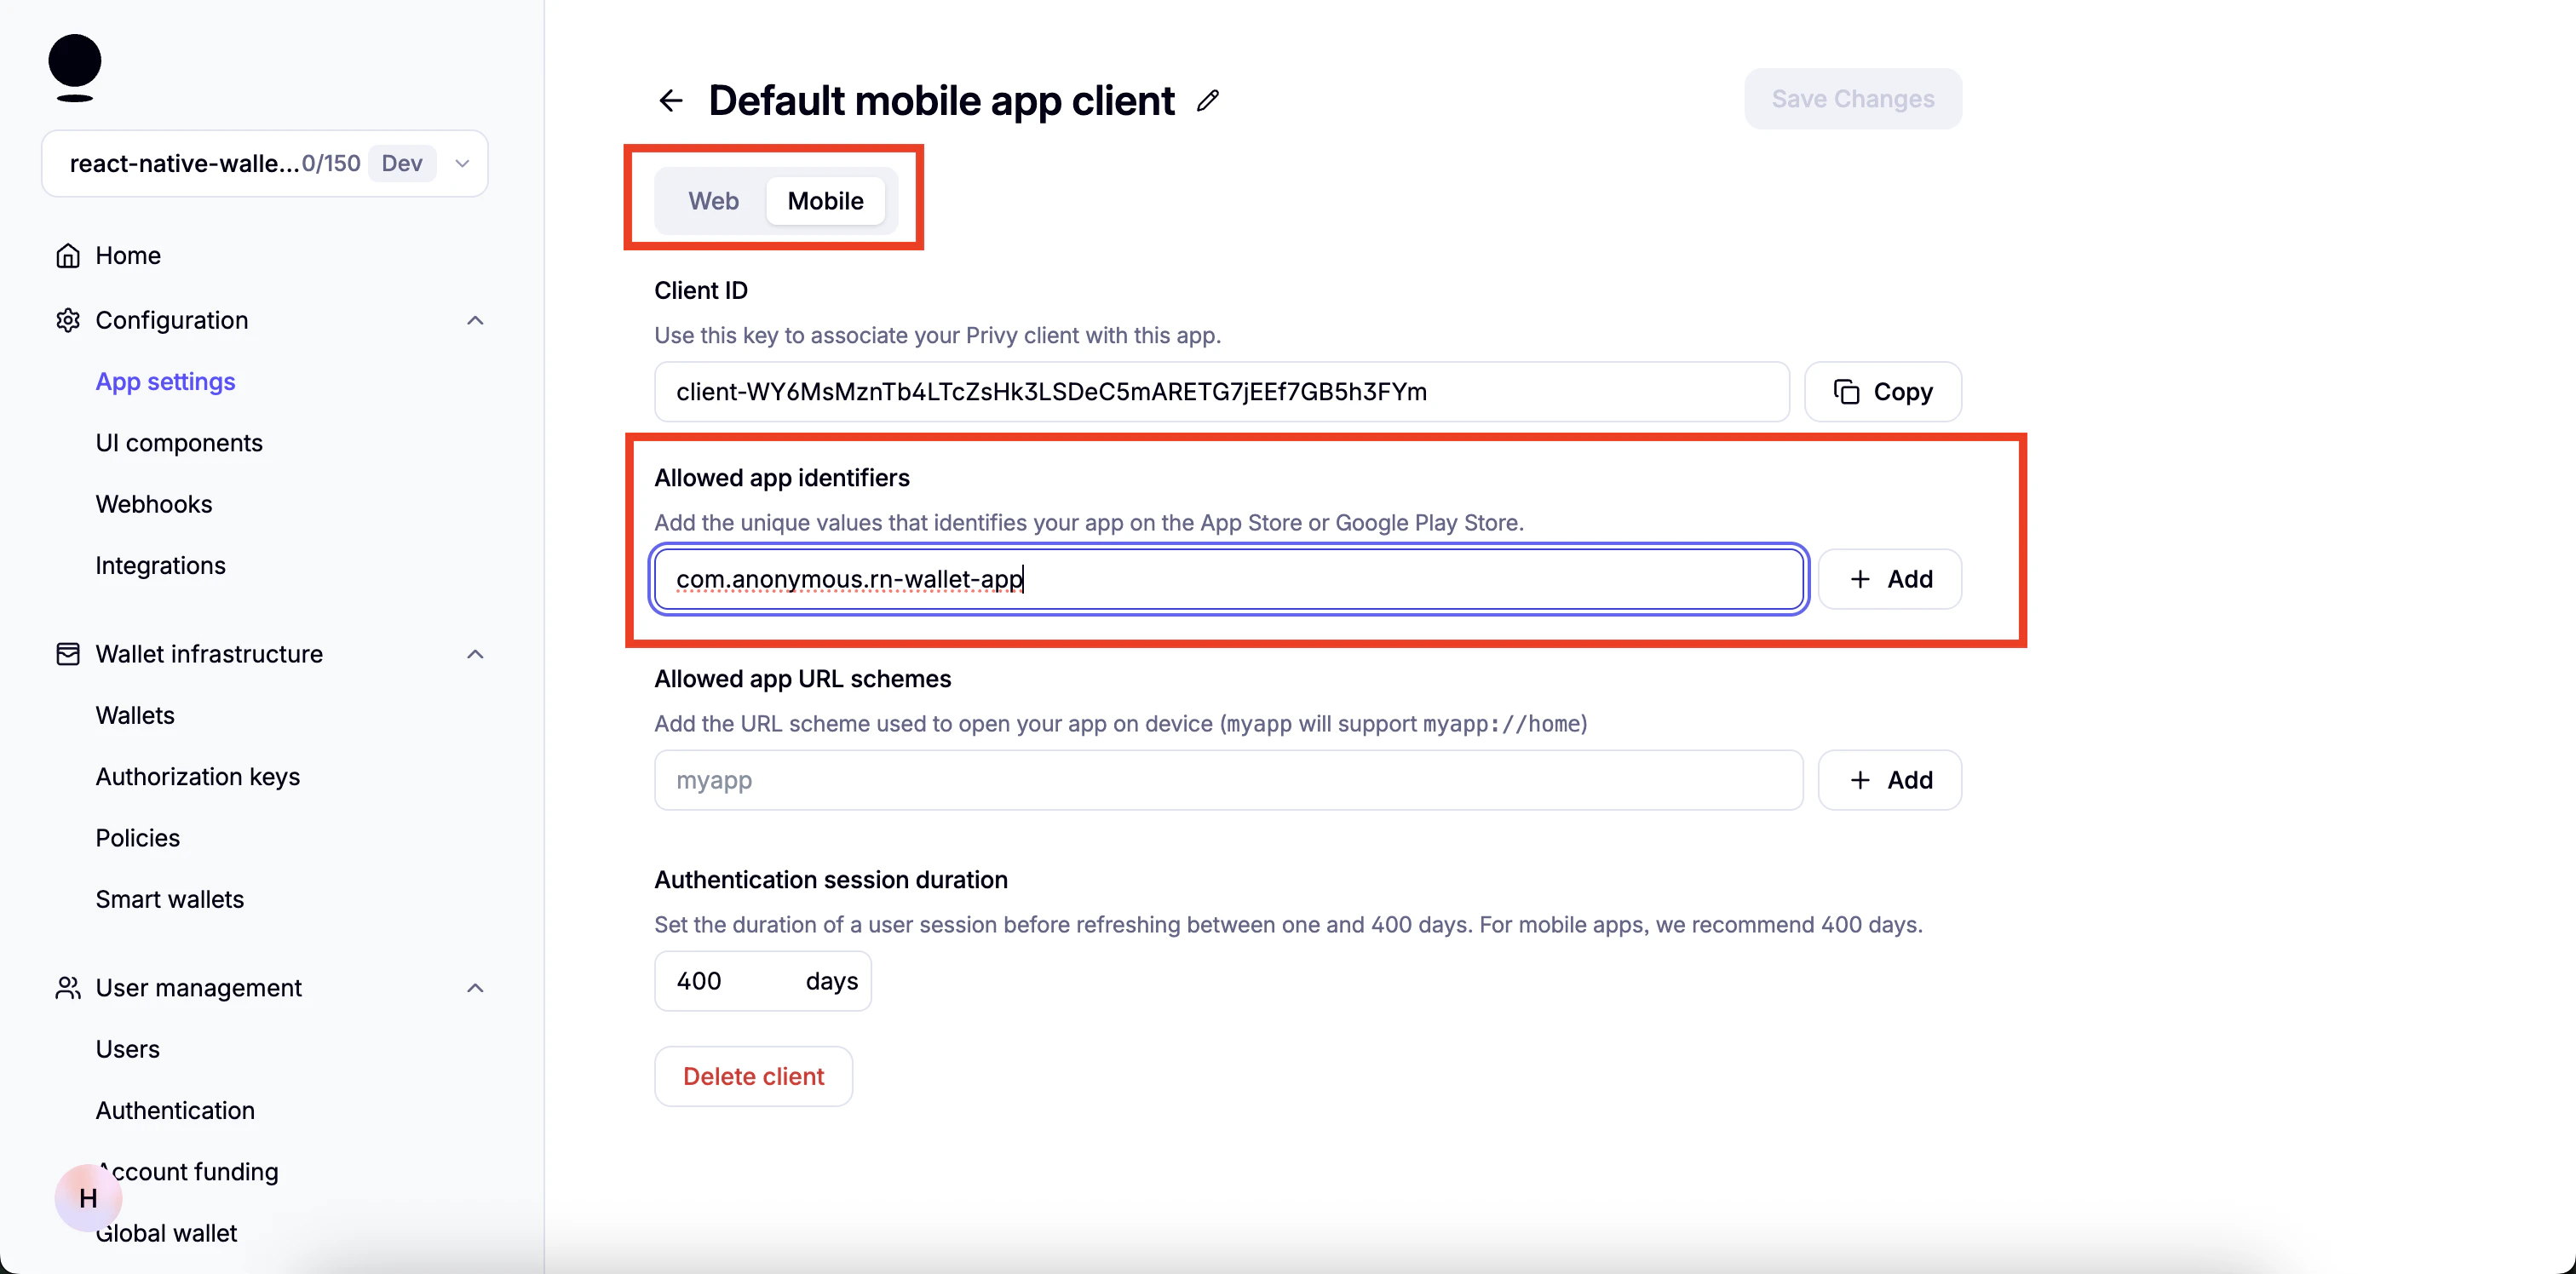
- You can copy the
Client IDand use as the value forEXPO_PUBLIC_PRIVY_CLIENT_ID.
Start the app
The below commands will start the app in Expo Go app on respective devices. For iOS:Folder structure of the template
Modifying the app name
| iOS | Android |
|---|---|
name property in the app.json file.
Modifying the App Icon & Splash Screen
App Icon
| iOS | Android |
|---|---|
assets/images/icon.png file.
Recommended App Icon size is 1024x1024.
If you name the icon file something else then edit the icon property in app.json accordingly.
Splash Screen
| iOS | Android |
|---|---|
 |  |
splash object in app.json to modify the splash screen.
Modifying fonts for the app
You can create afonts folder inside assets folder and keep your custom font files in the fonts folder.
To use the custom font, load the font in the app/_layout.tsx file.
Example:
Modifying the deeplinking scheme
Edit thescheme property in app.json file, for your custom deeplinking scheme.
rnwalletapp, then rnwalletapp:// URLs would open your app when tapped.
This is a build-time configuration, it has no effect in Expo Go.
Editing the landing screen
| iOS | Android |
|---|---|
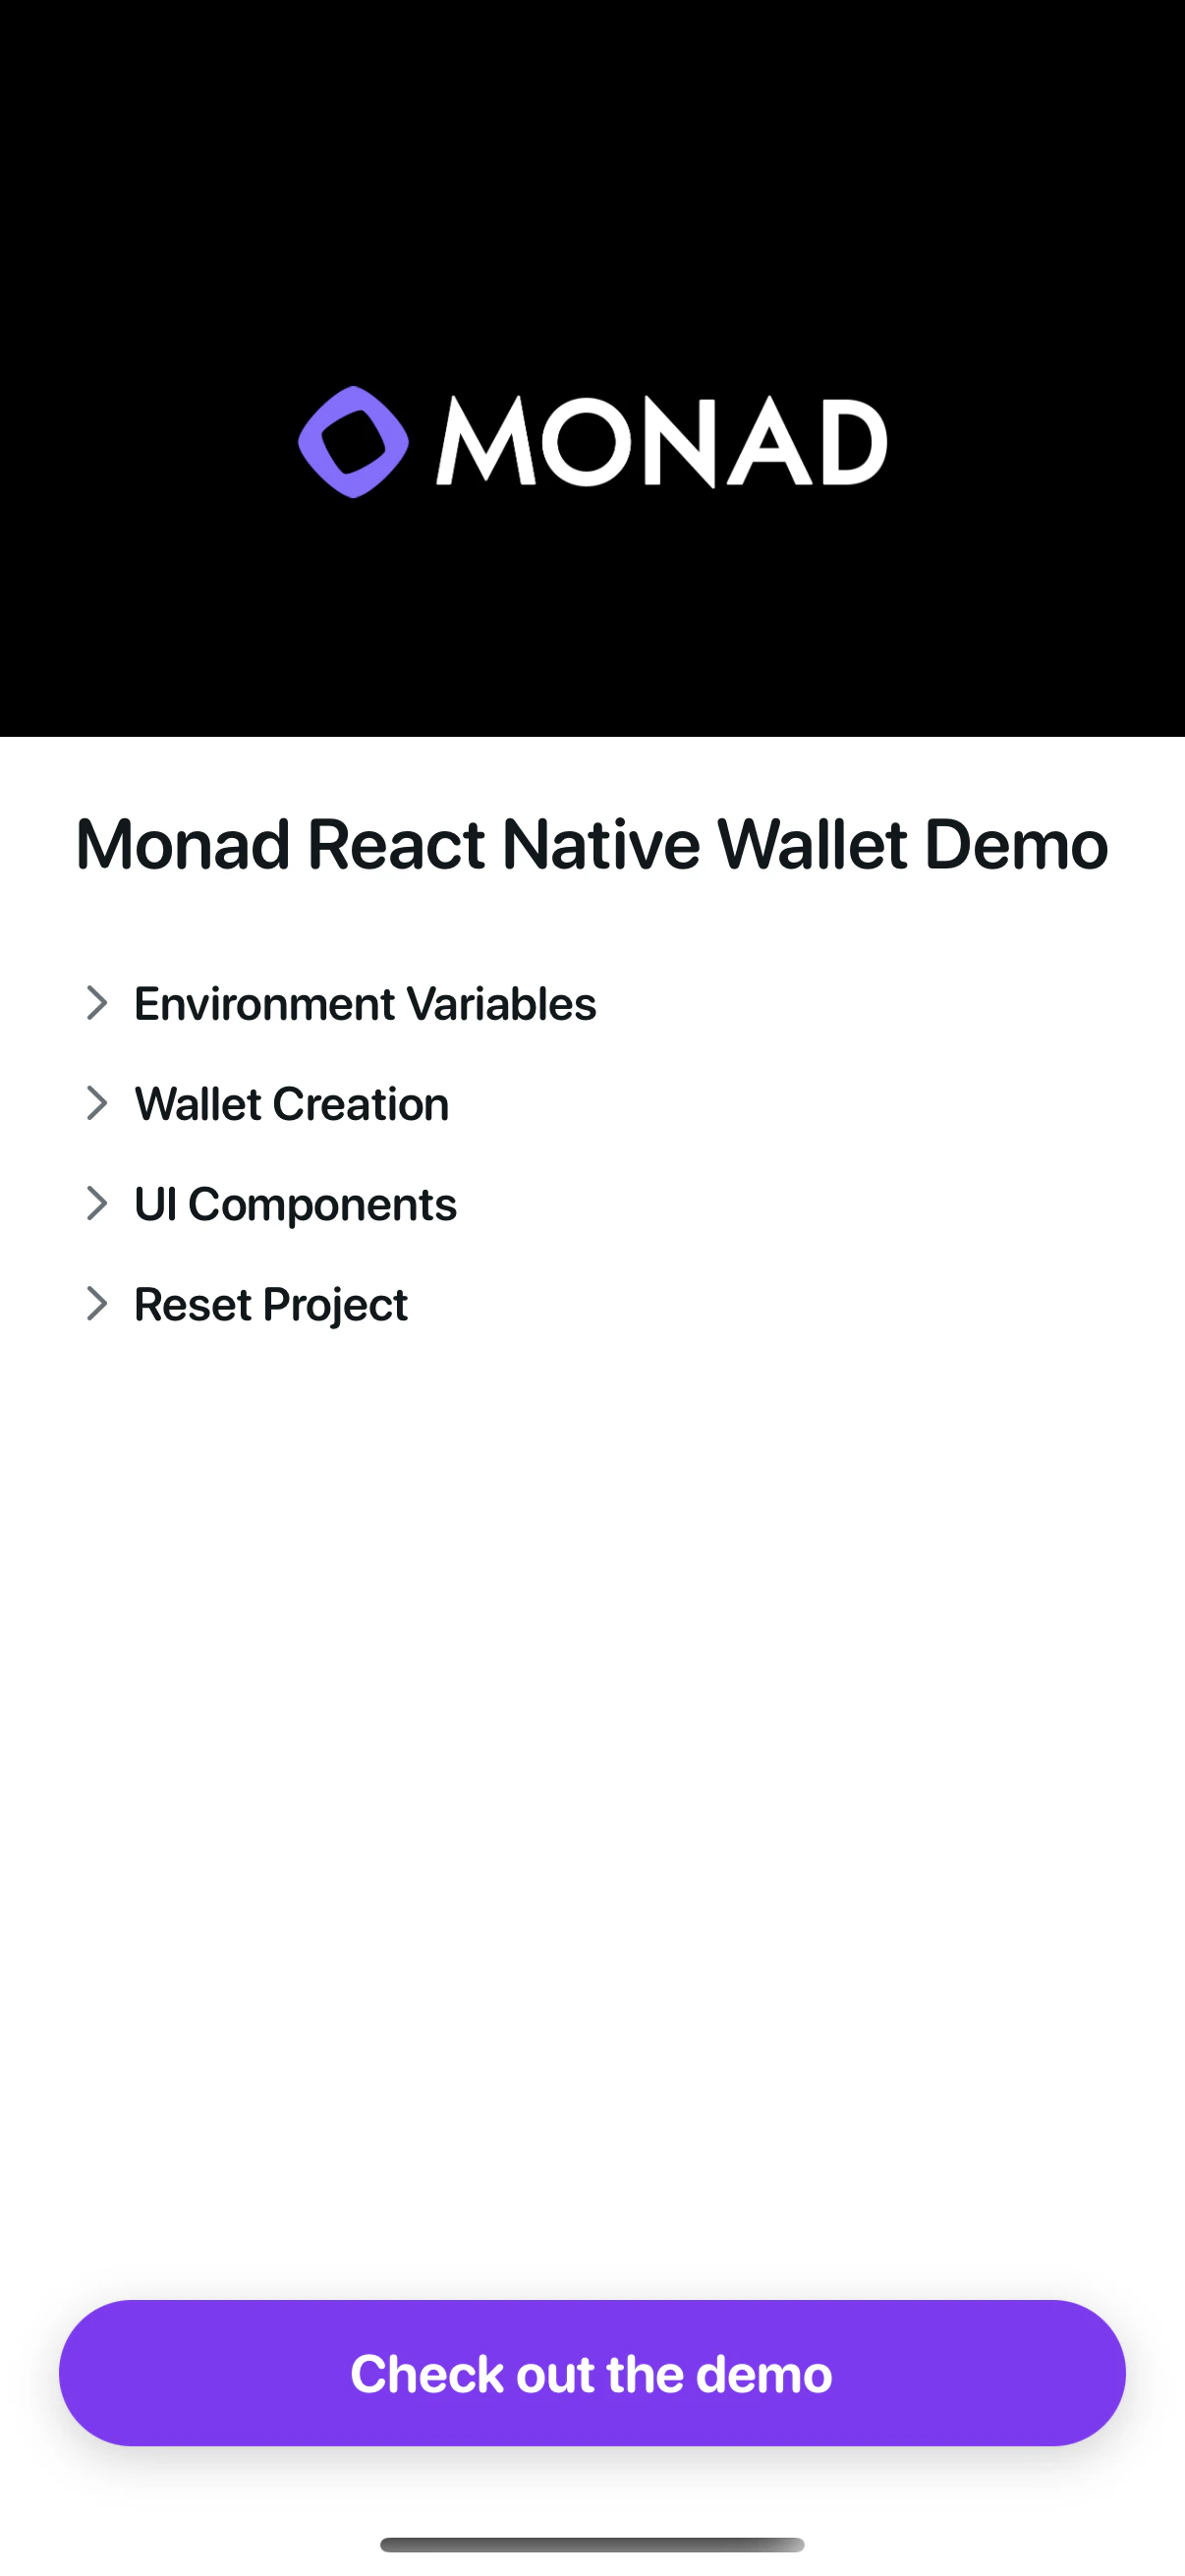 |  |
app/index.tsx.
Wallet Actions
The template has example code for the following Wallet Actions:Modifying the package/bundle identifier
When publishing app to the app store you need to have a unique package/bundle identifier you can change it in inapp.json.
Check out the demo app
If you want try the demo app before you start developing you can switch to thedemo branch available with the repo:
Folder structure of the demo project (Change to demo branch to view this)
Learn more
To learn more about developing your project with Expo, Privy, and Monad, check out the following resources:- Expo docs | guides | tutorial
- Privy: create a wallet | send a transaction | sign a transaction
- Monad: supported tooling and infra